Build BOTS!
Make a Robot Fin Gripper!
Adapted from the book BOTS! from Nomad Press by author Kathy Ceceri

Just like the fins on a fish, robot fin grippers can curve back and forth. They are compliant, which means they bend out of the way when they come in contact with an object. This makes them safe to use for delicate items (and around humans)!


Part 1: Make the Fin Gripper “Fingers”
Supplies
strip of cardstock or any heavy paper or thin cardboard, about 11 by 1 ½ inches
scissors
pen
tape or glue (or see the tip below)
Optional:
Fin Gripper template
Instructions

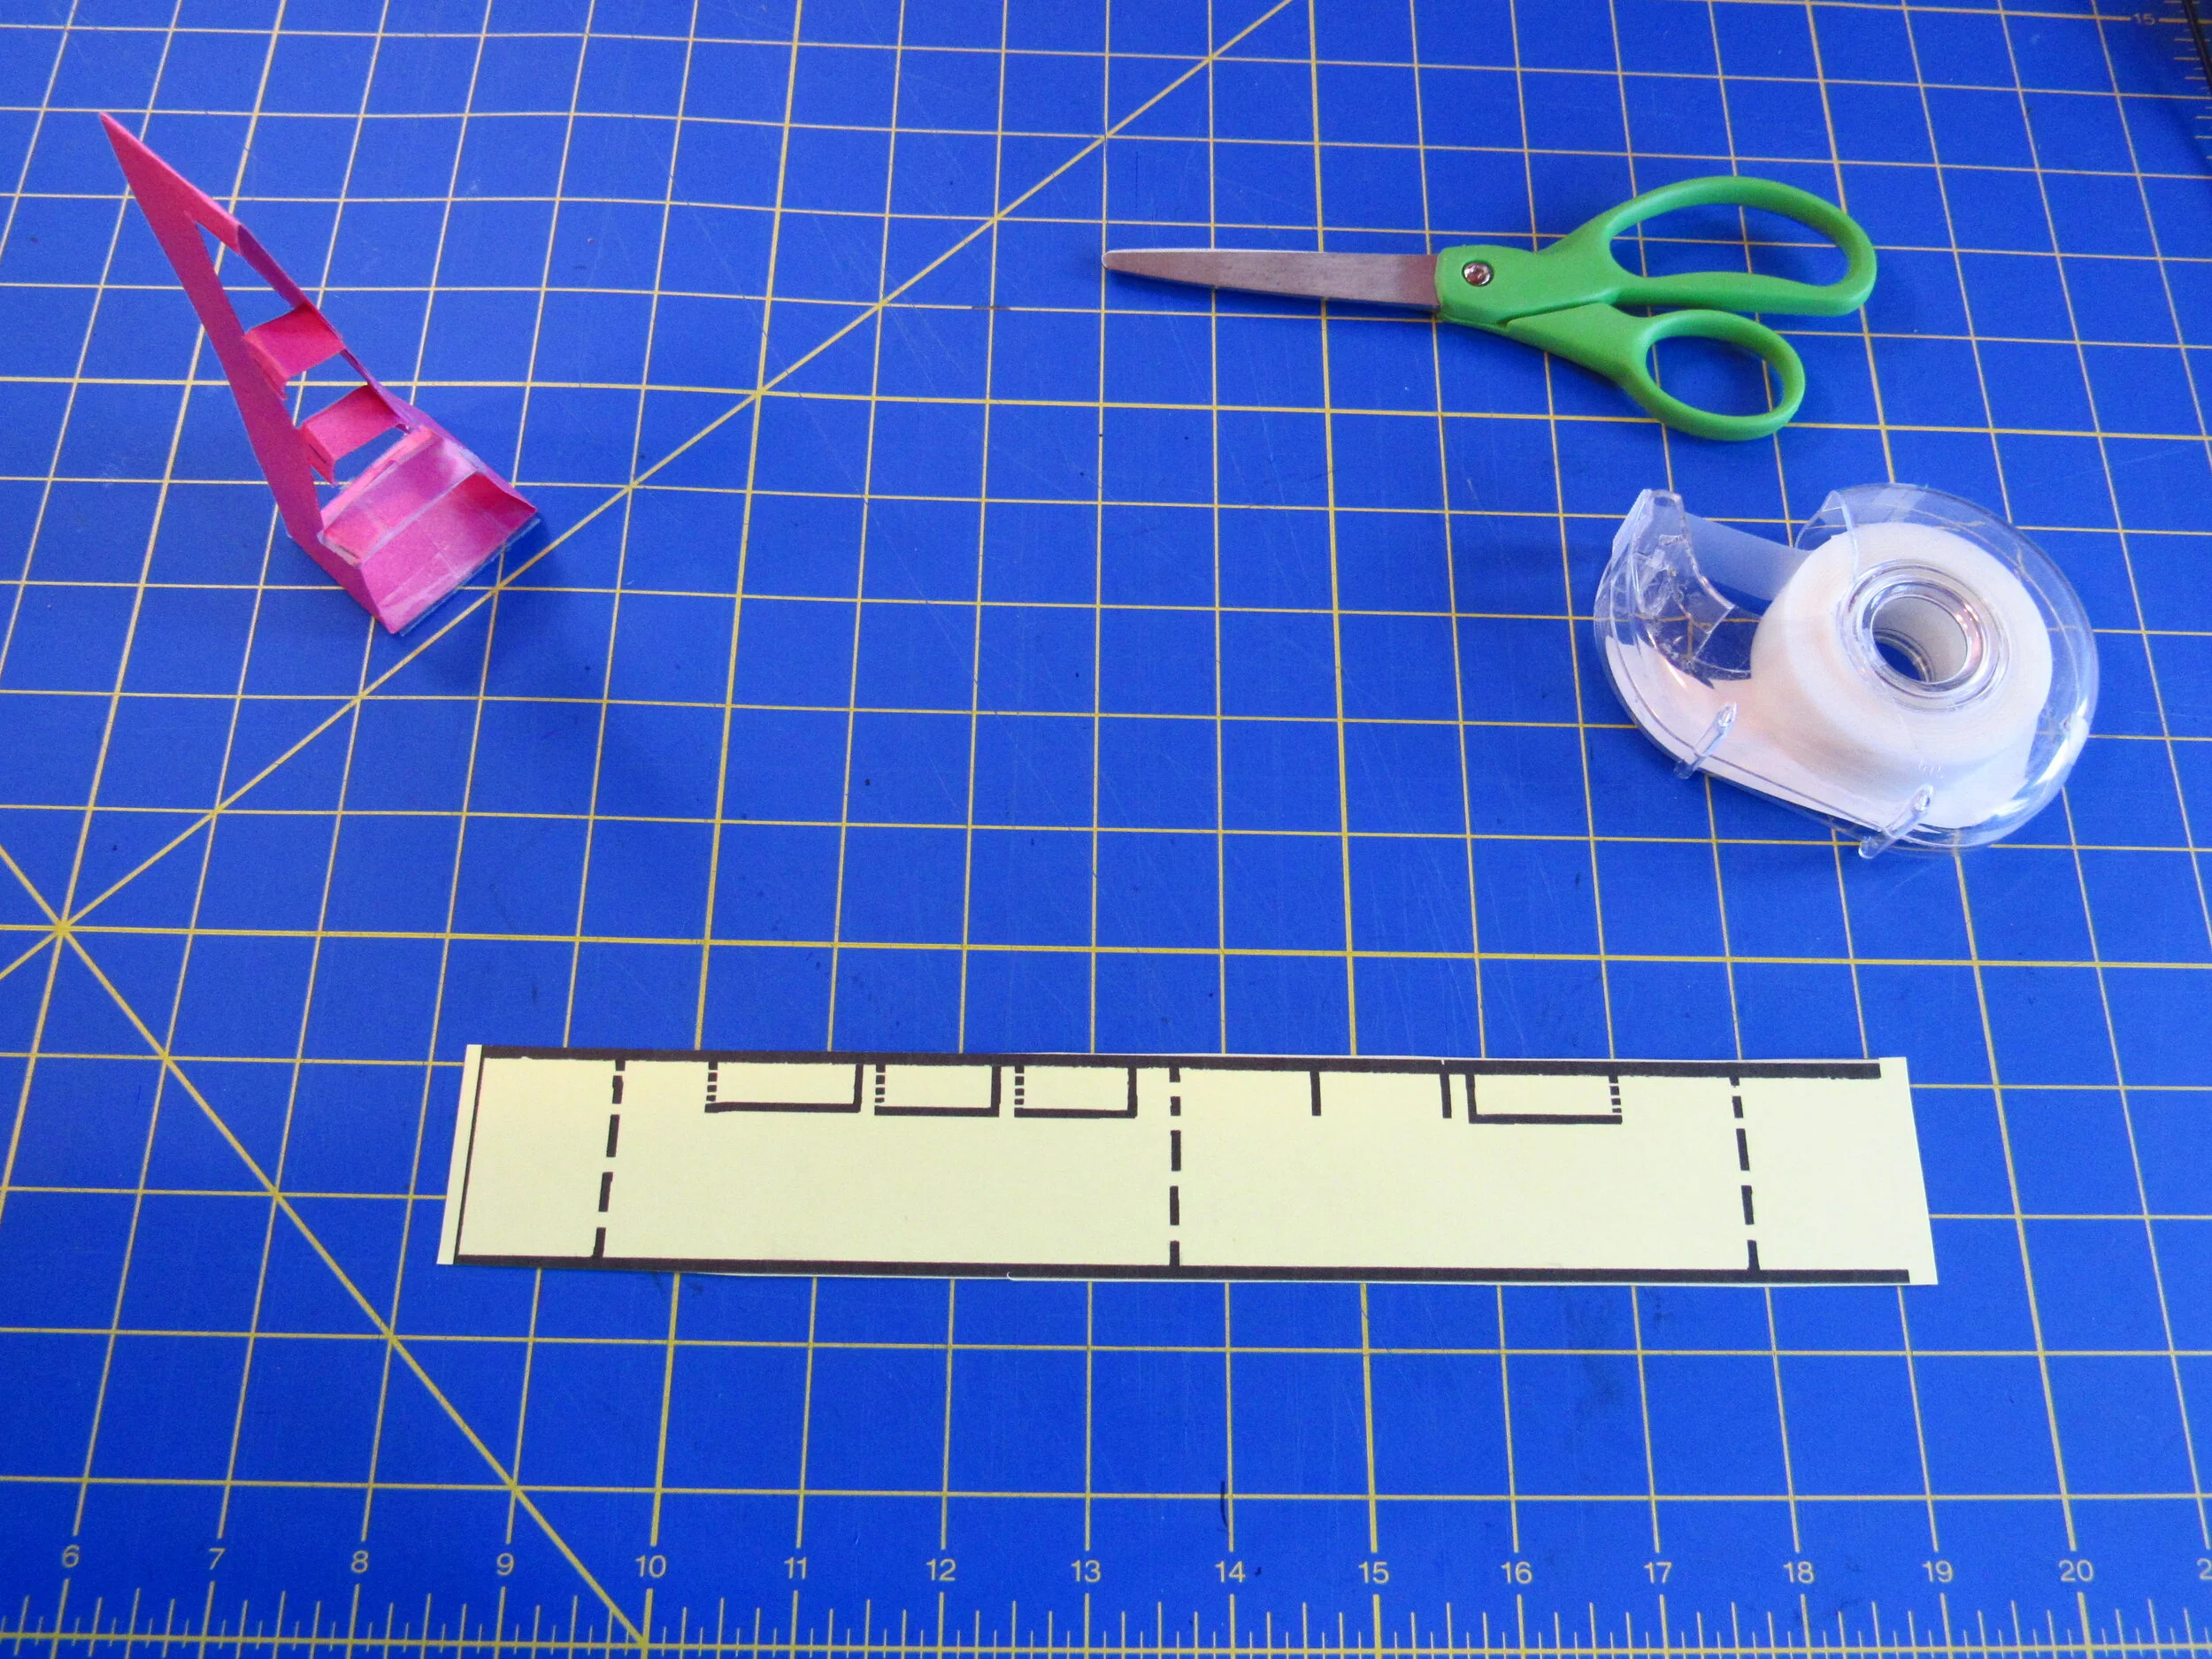
Fin Gripper finger template — Use for reference, or click to go to templates. One strip is needed for each gripper finger.
Notes
Dotted lines = fold. Solid lines = cut.
You can make your gripper any size, as long as the proportions are similar – in other words, keep the shape about the same.
No tape or glue? Secure the tabs by cutting slots in each piece and hooking them together.
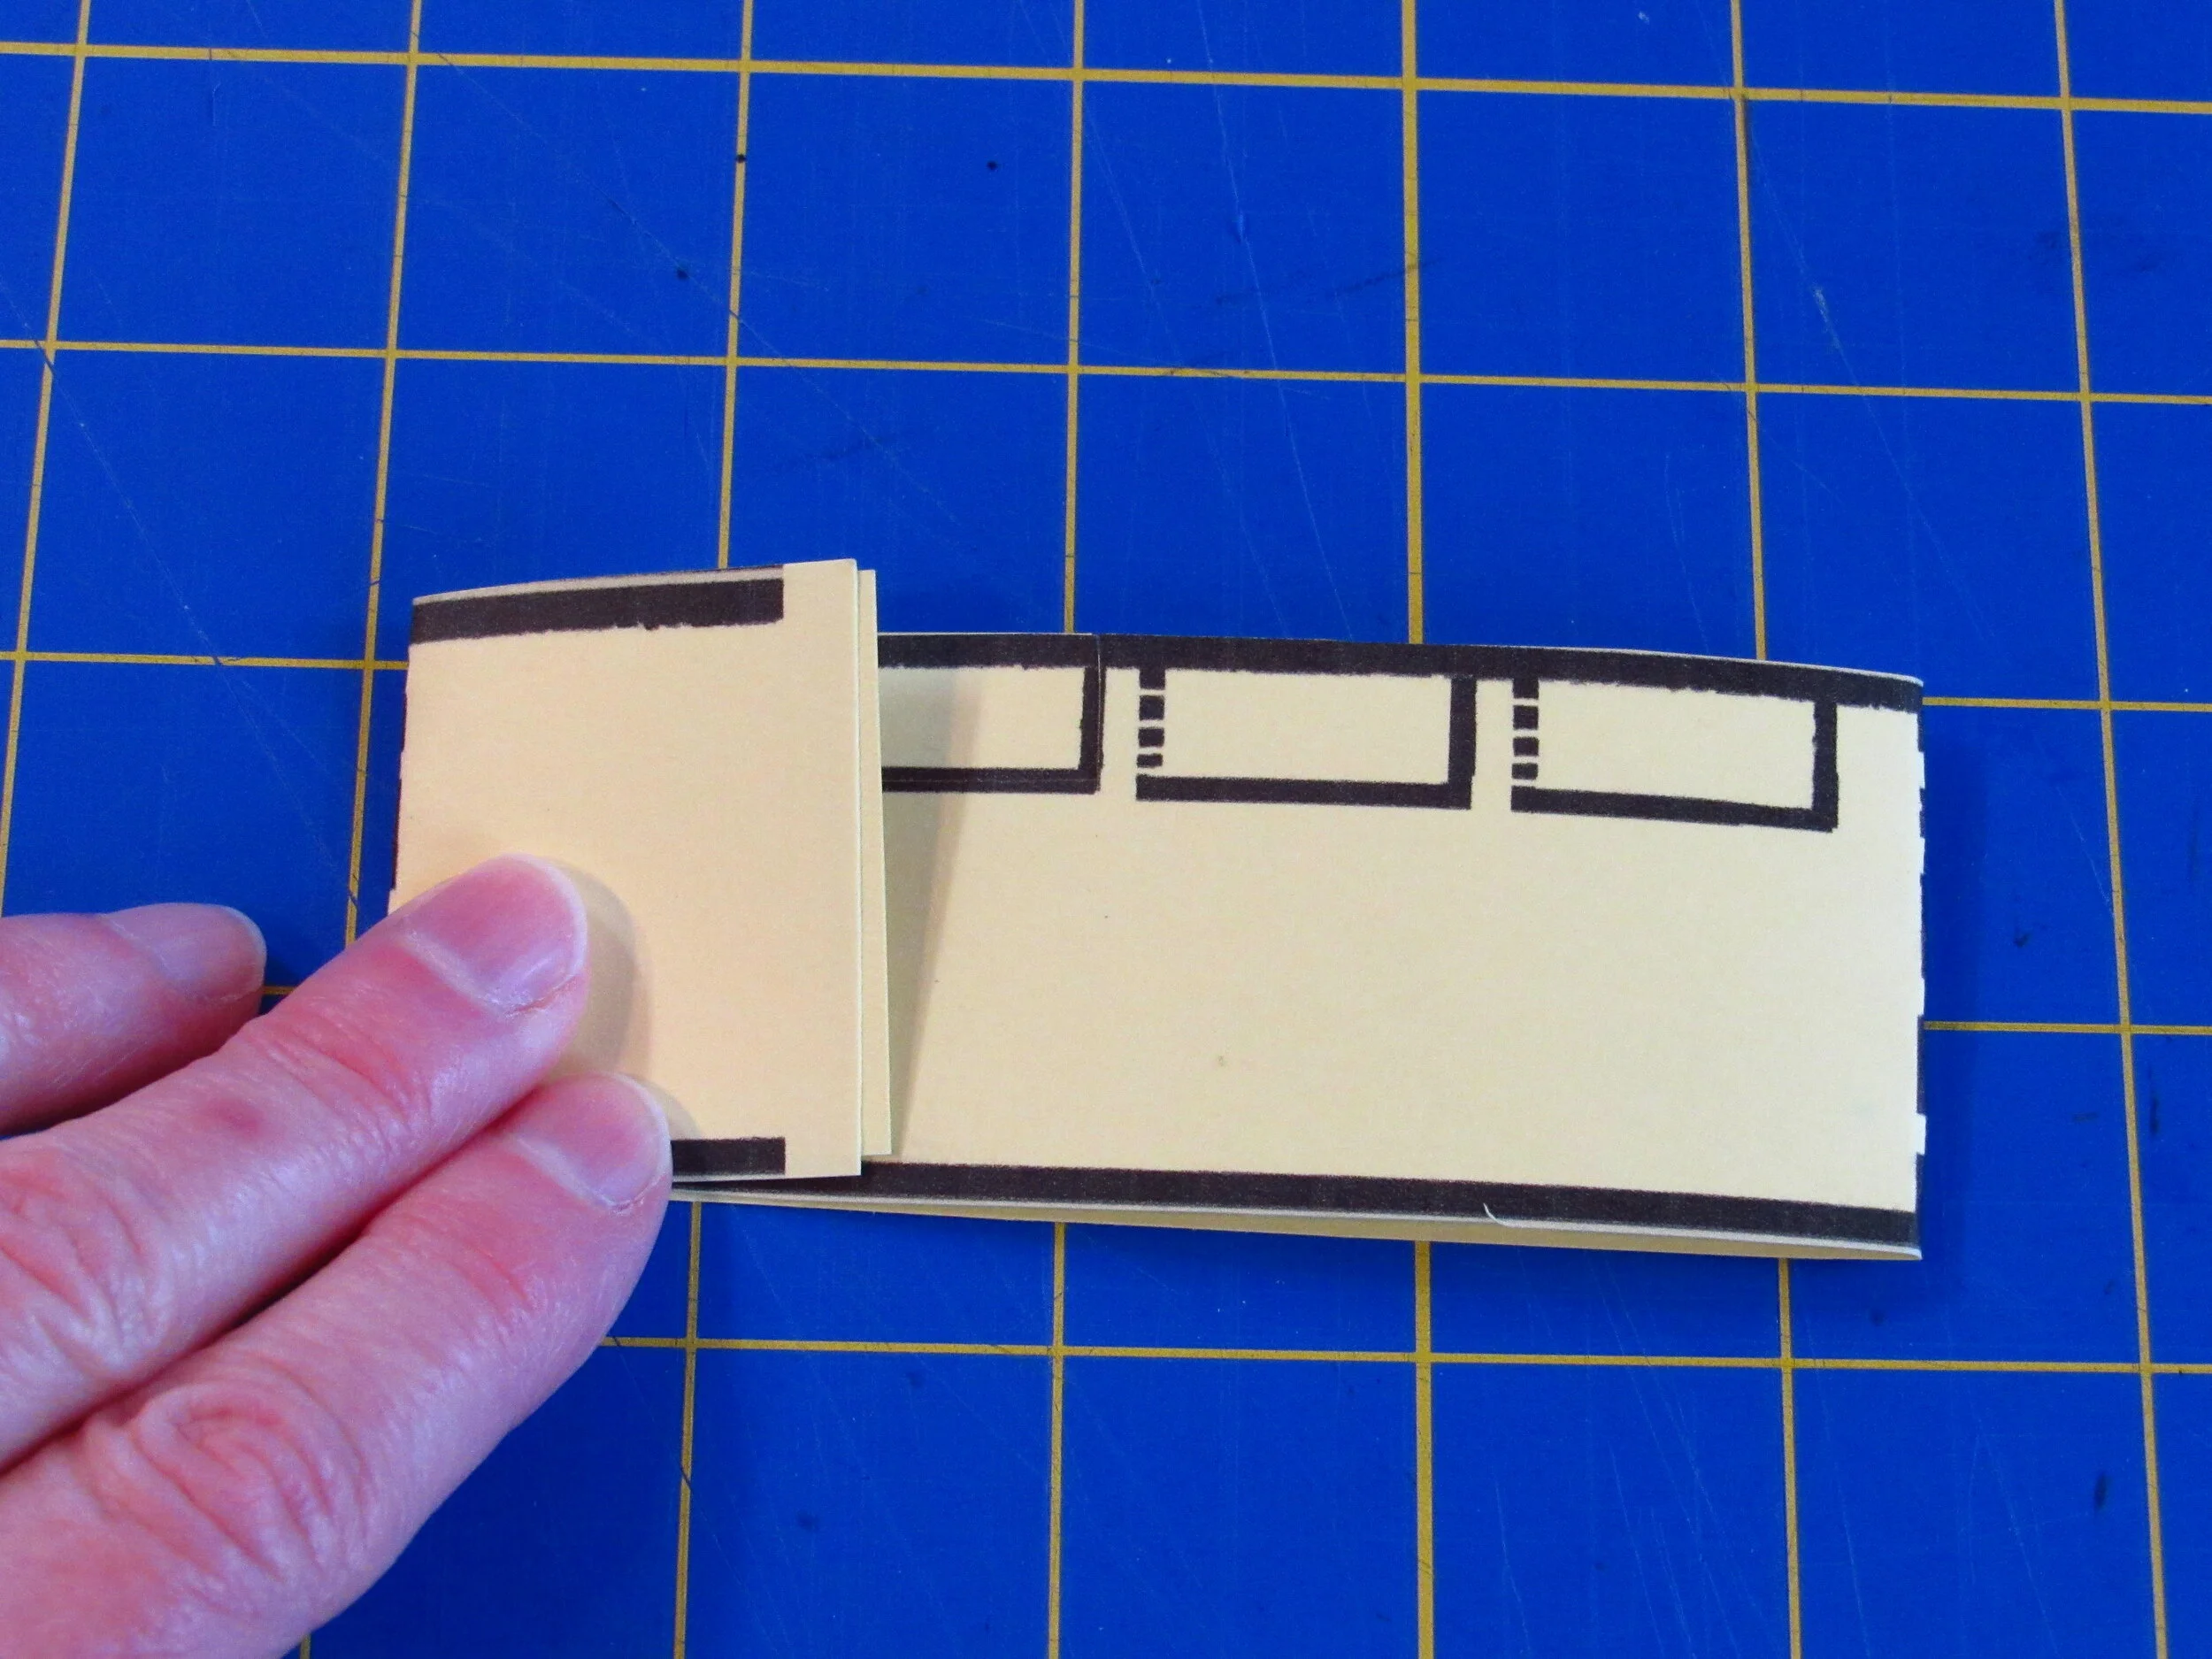
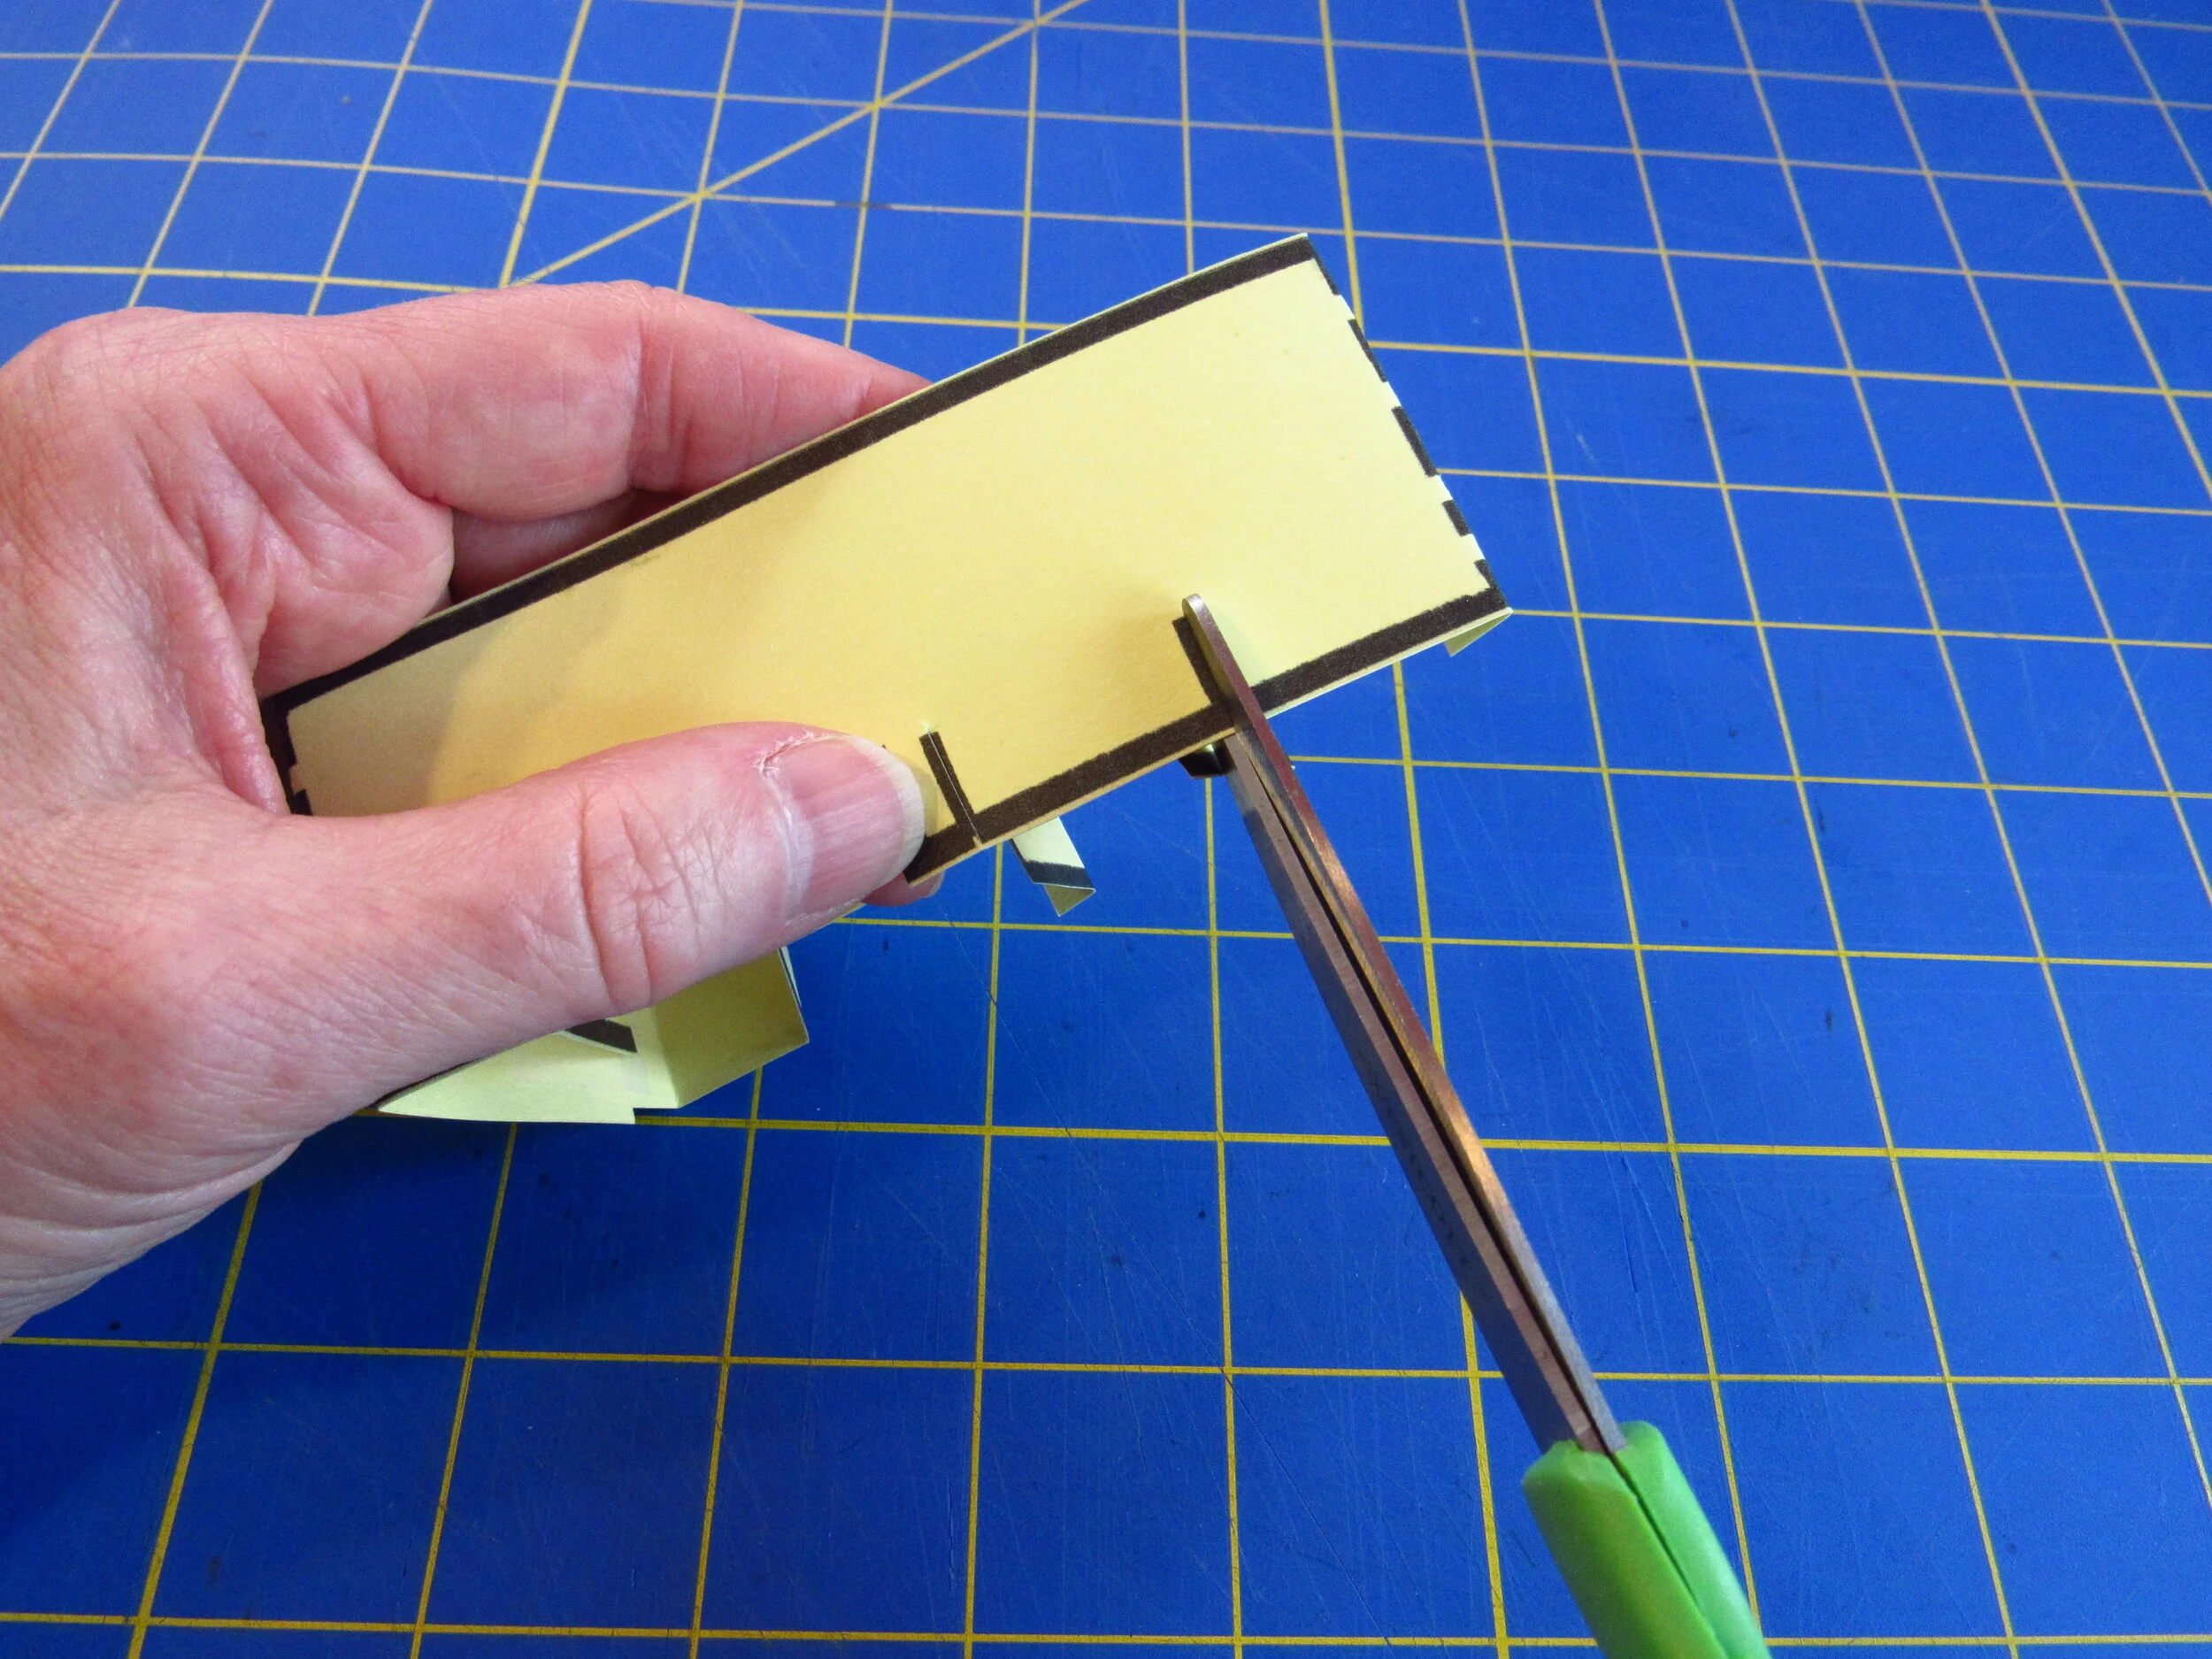
Fold cardboard strip in half. With bottom edges together, fold up about 1¼ inches from the bottom to make tabs to form the base of the triangle. Then flatten the folded piece again.
Draw marks about 1, 2, and 3 inches above fold line. Flip over and copy on other side.
To make the “rungs” of the “ladder,” draw a tab about ¼ inch wide from the bottom mark to just below the middle mark. Repeat with the middle and top marks.
For the bottom rung only, cut along the tab you drew through both sides of the cardboard.
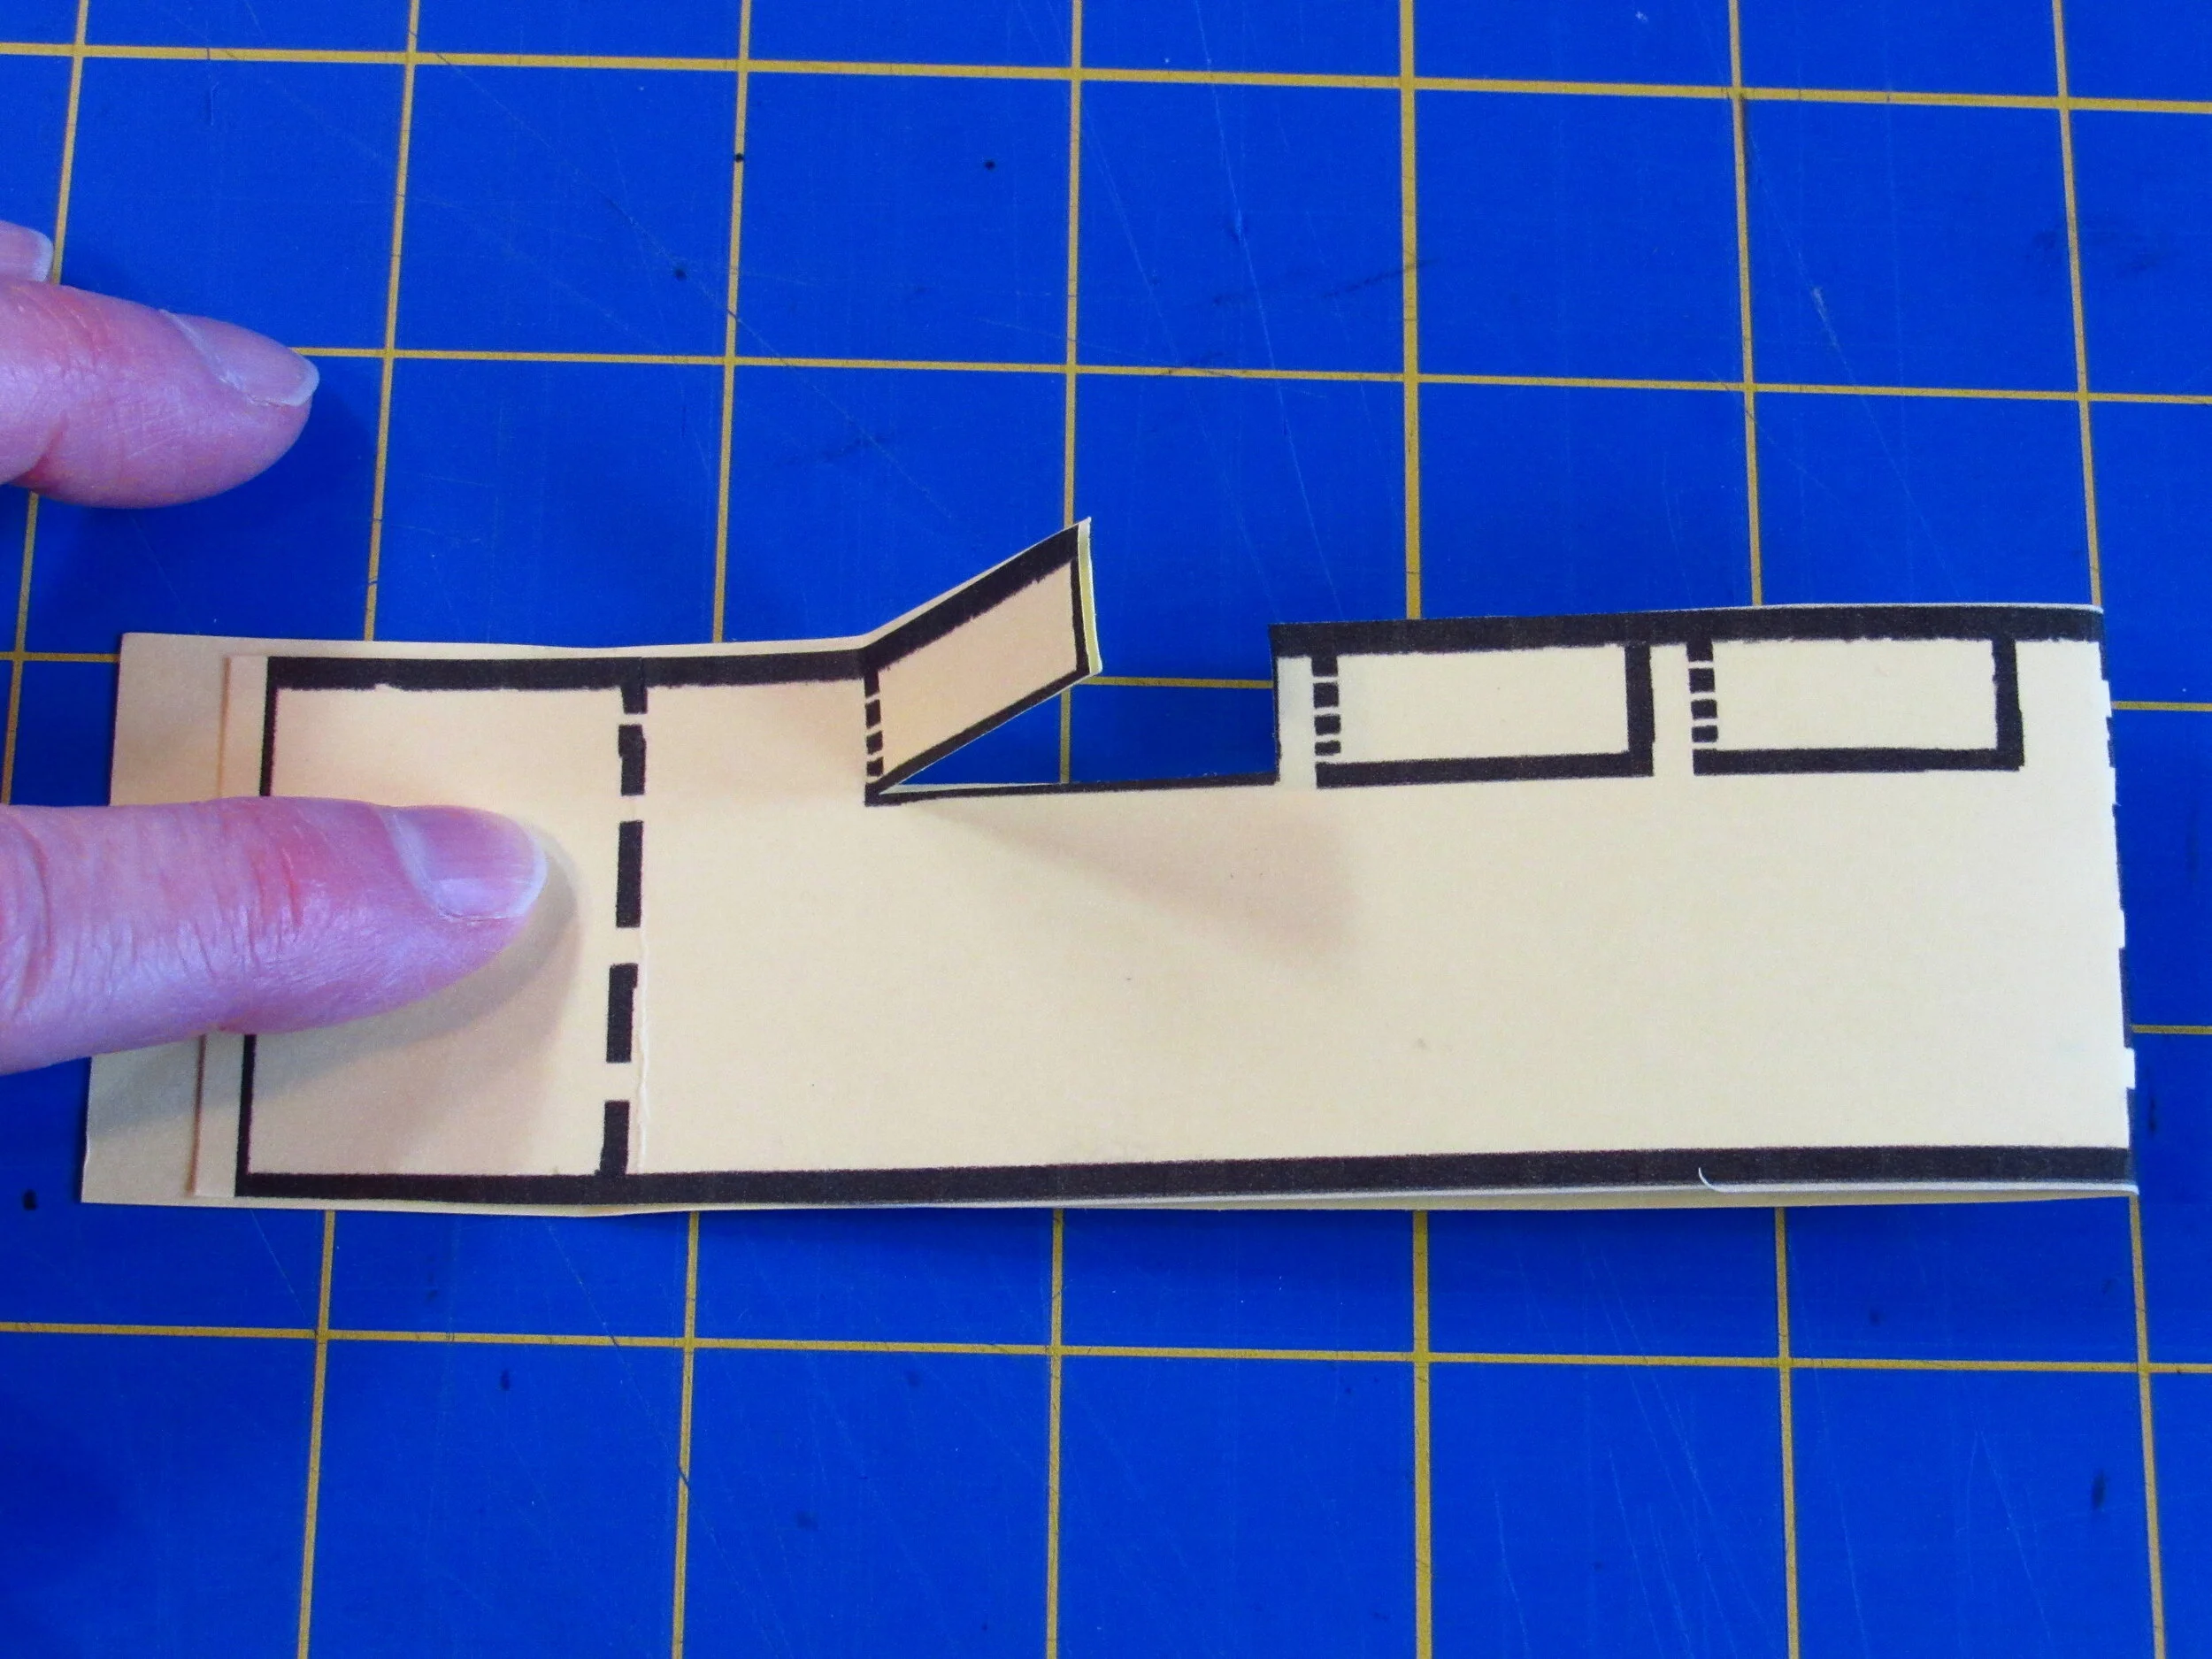
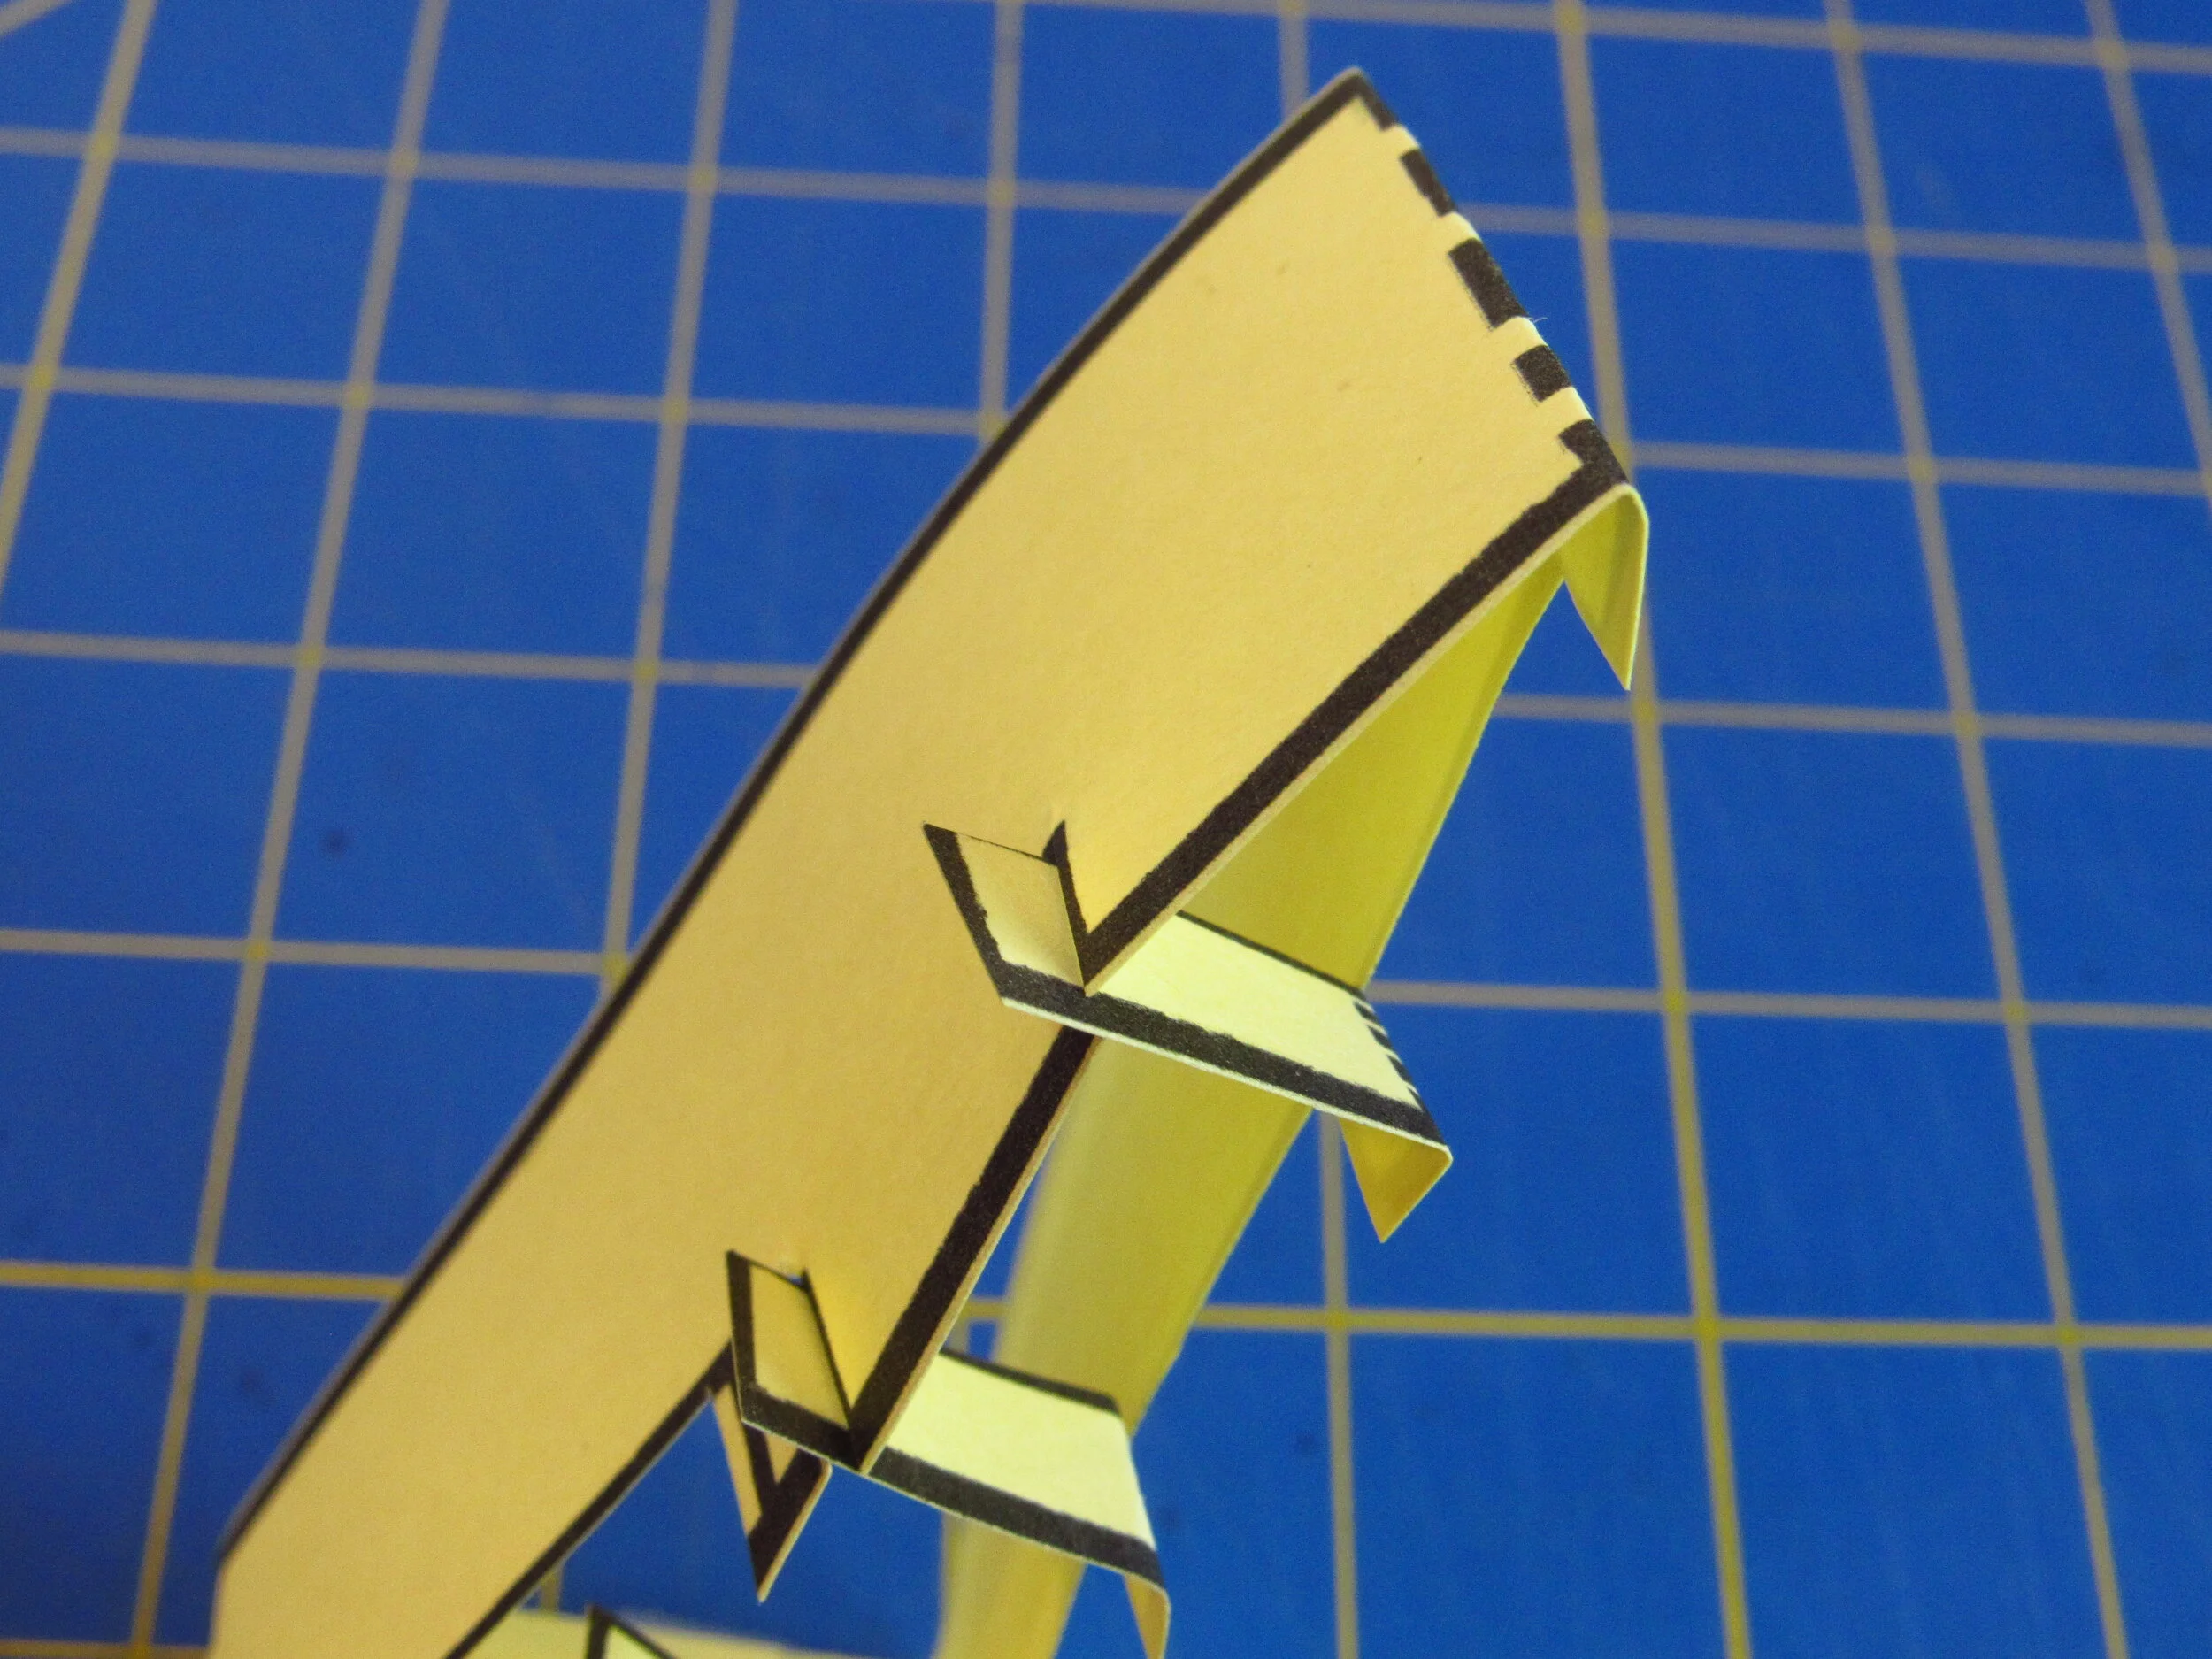
To form the base of the triangle, spread the sides apart. Fold both base tabs in towards the middle. Overlap so that the base is about 2 inches wide. Tape the base tabs together.
Fold the bottom rung tabs in. They should overlap, but don’t tape them yet.
Cut and fold the middle and top rungs in.
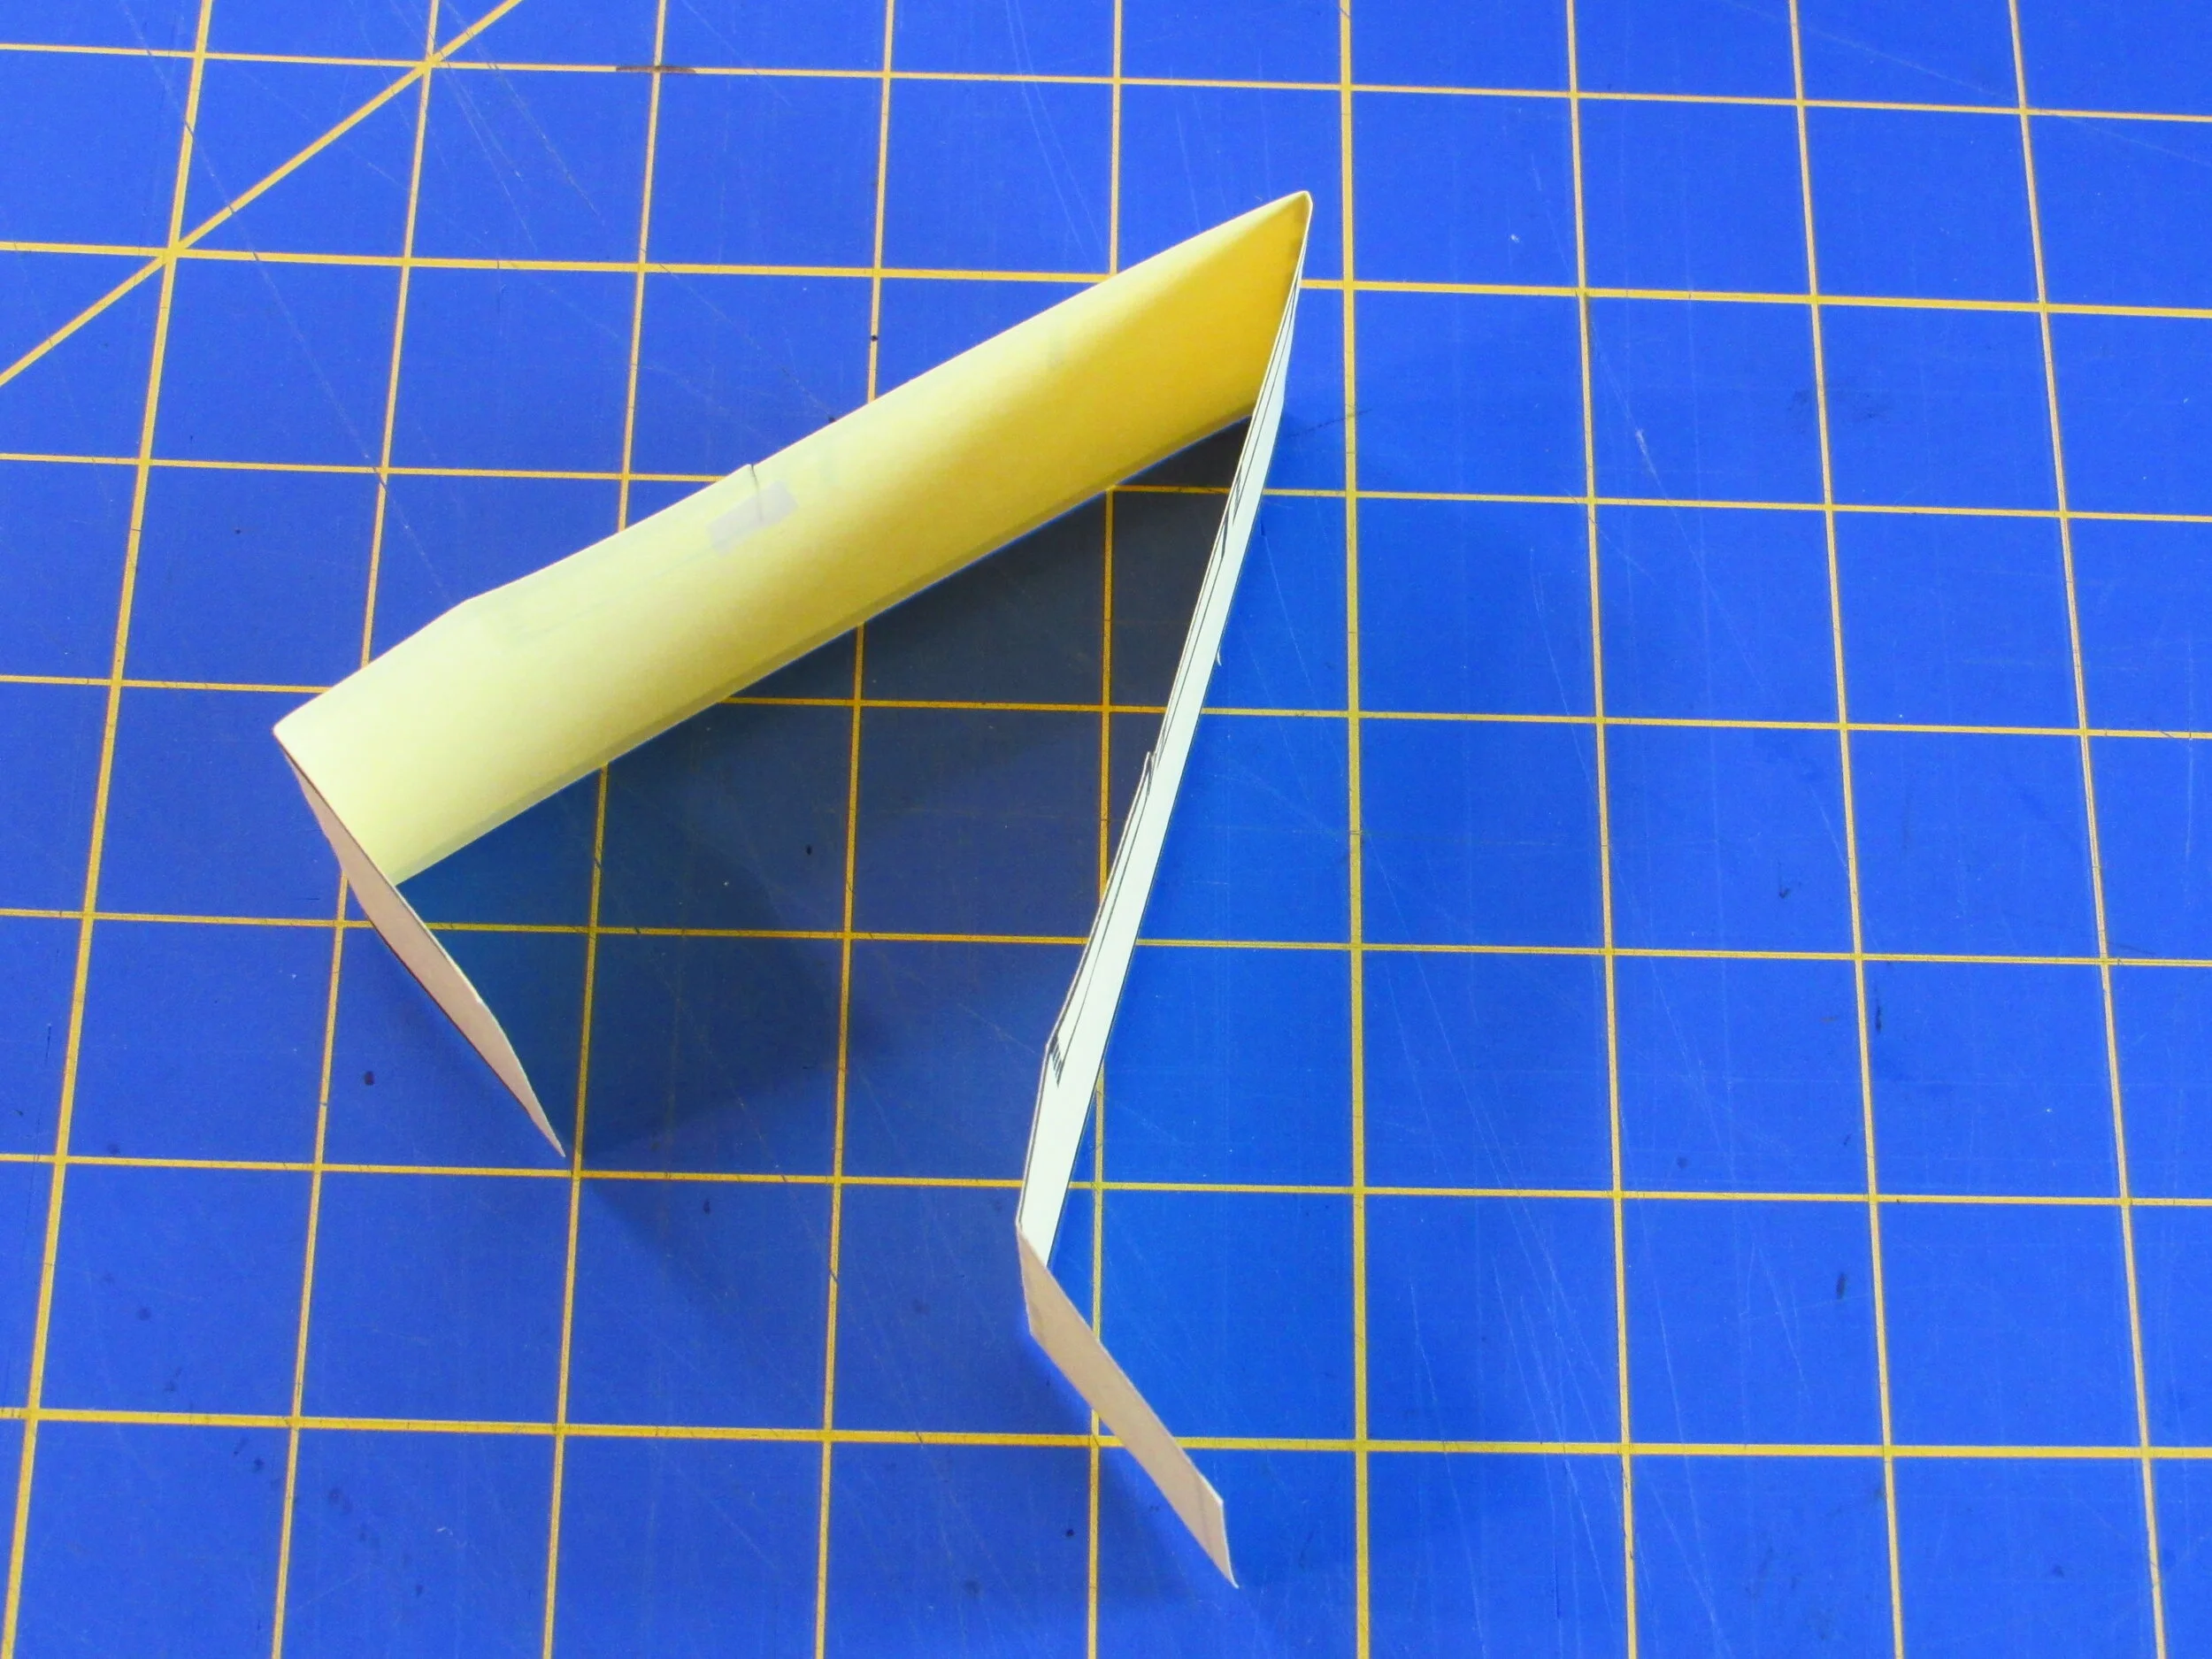
On the opposite side, cut slots at the middle and top marks. Insert the middle and top rungs through the slots. Fold down the extra bit and tape closed. It’s OK if the sides of the triangle are pulled in a little.
For the bottom rung, tape the overlapped ends together. Reinforce the rung with more tape.
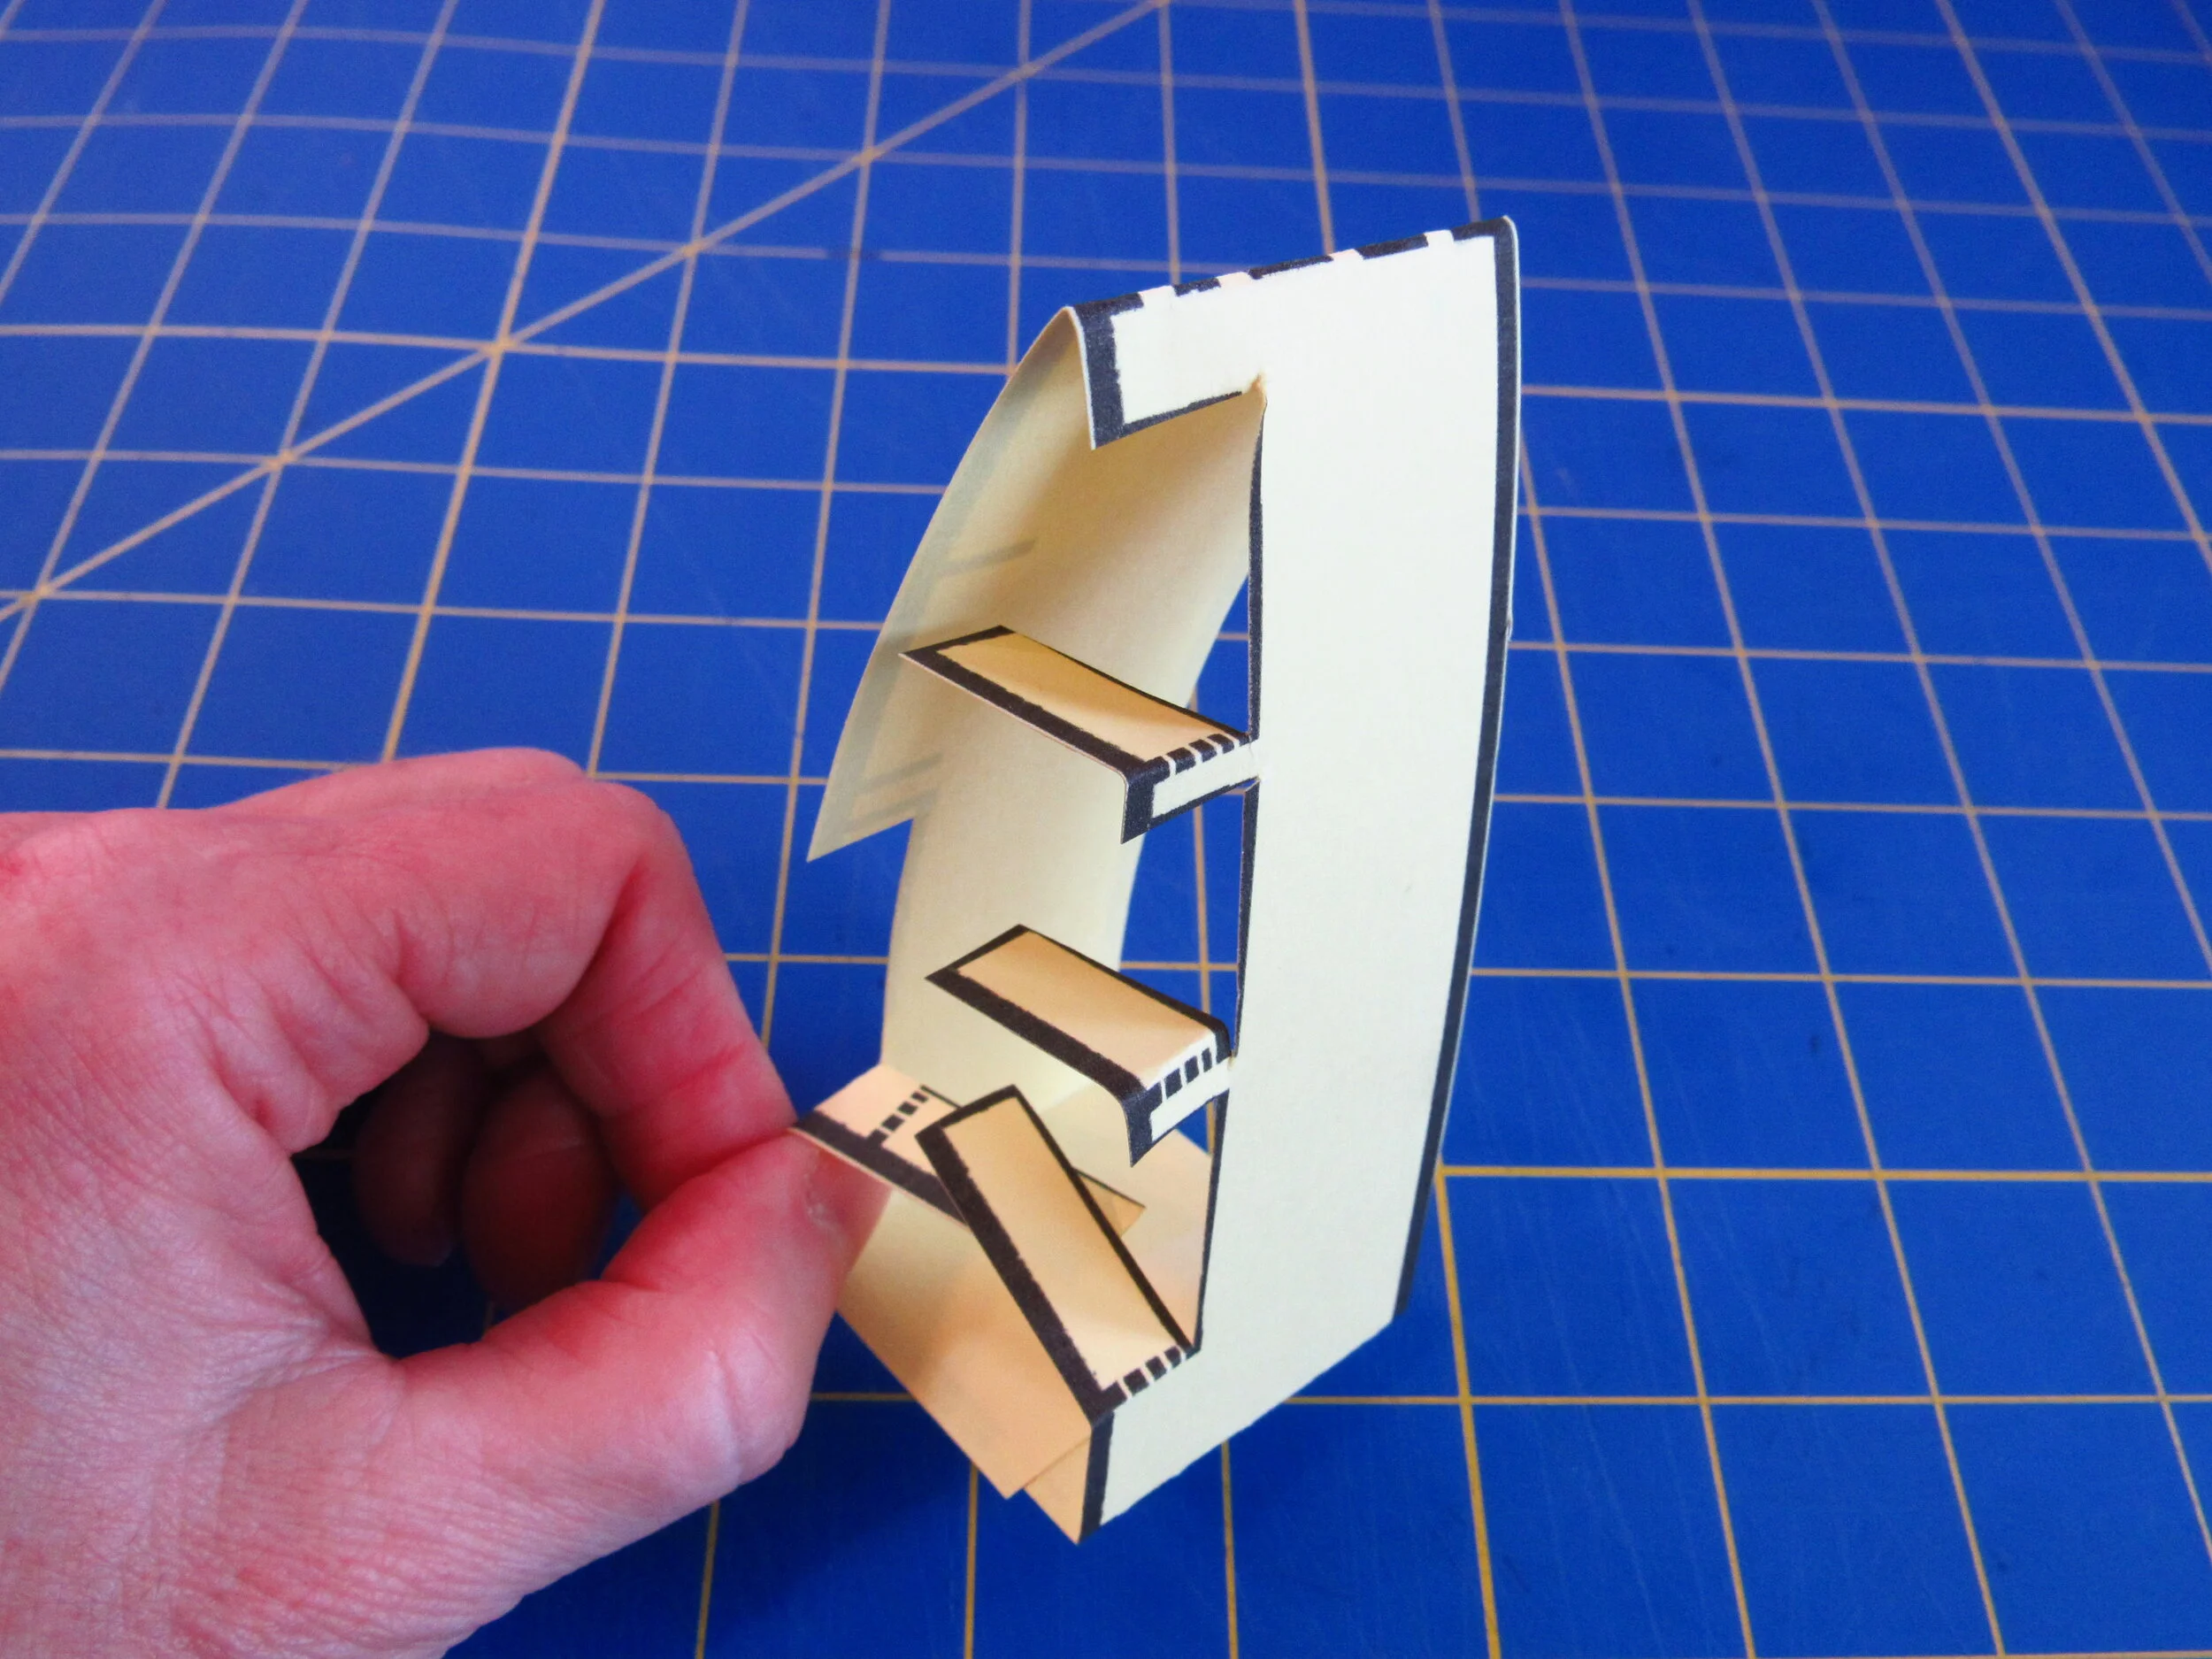
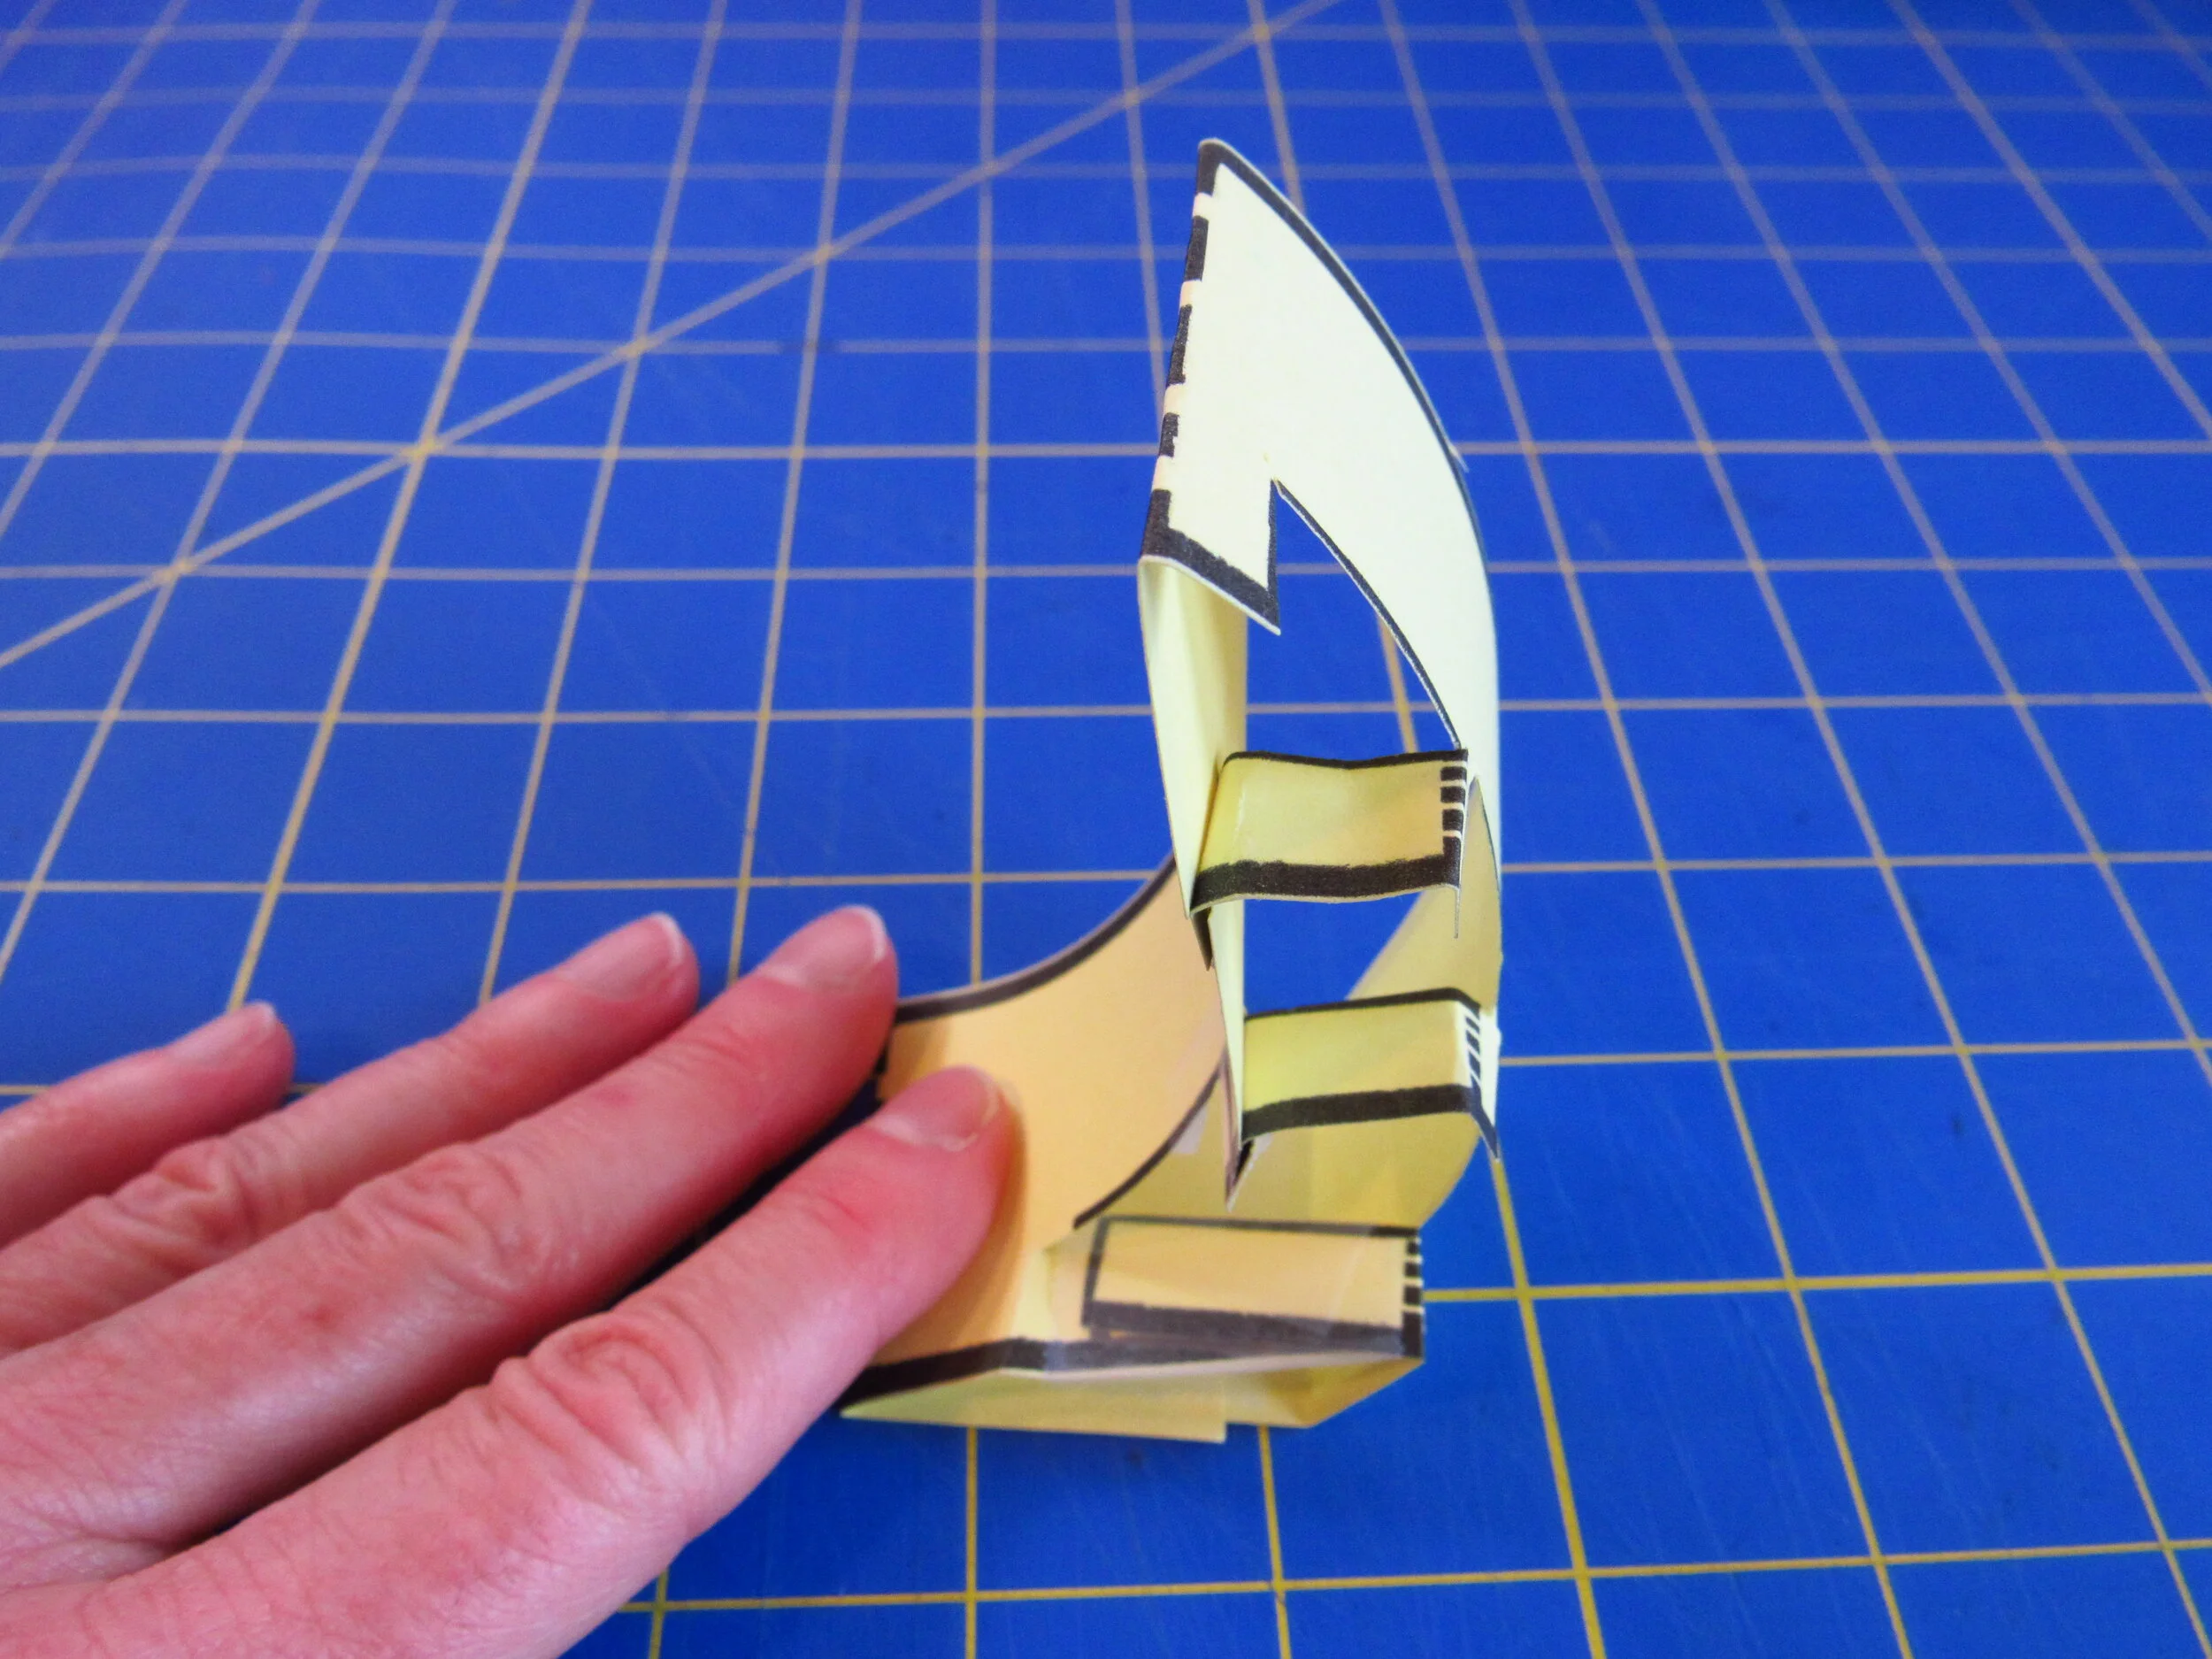
To test, squeeze one side of the base to make the gripper curl in that direction.
To make a pincer, make a second gripper and tape half the bottom to the lower side of the first. Pinch the taped section to bring the tips together!
Troubleshooting Tips -- If your gripper doesn't work, check that:
the rungs are not bending when the fin curves.
the tabs are held on tightly by the tape.
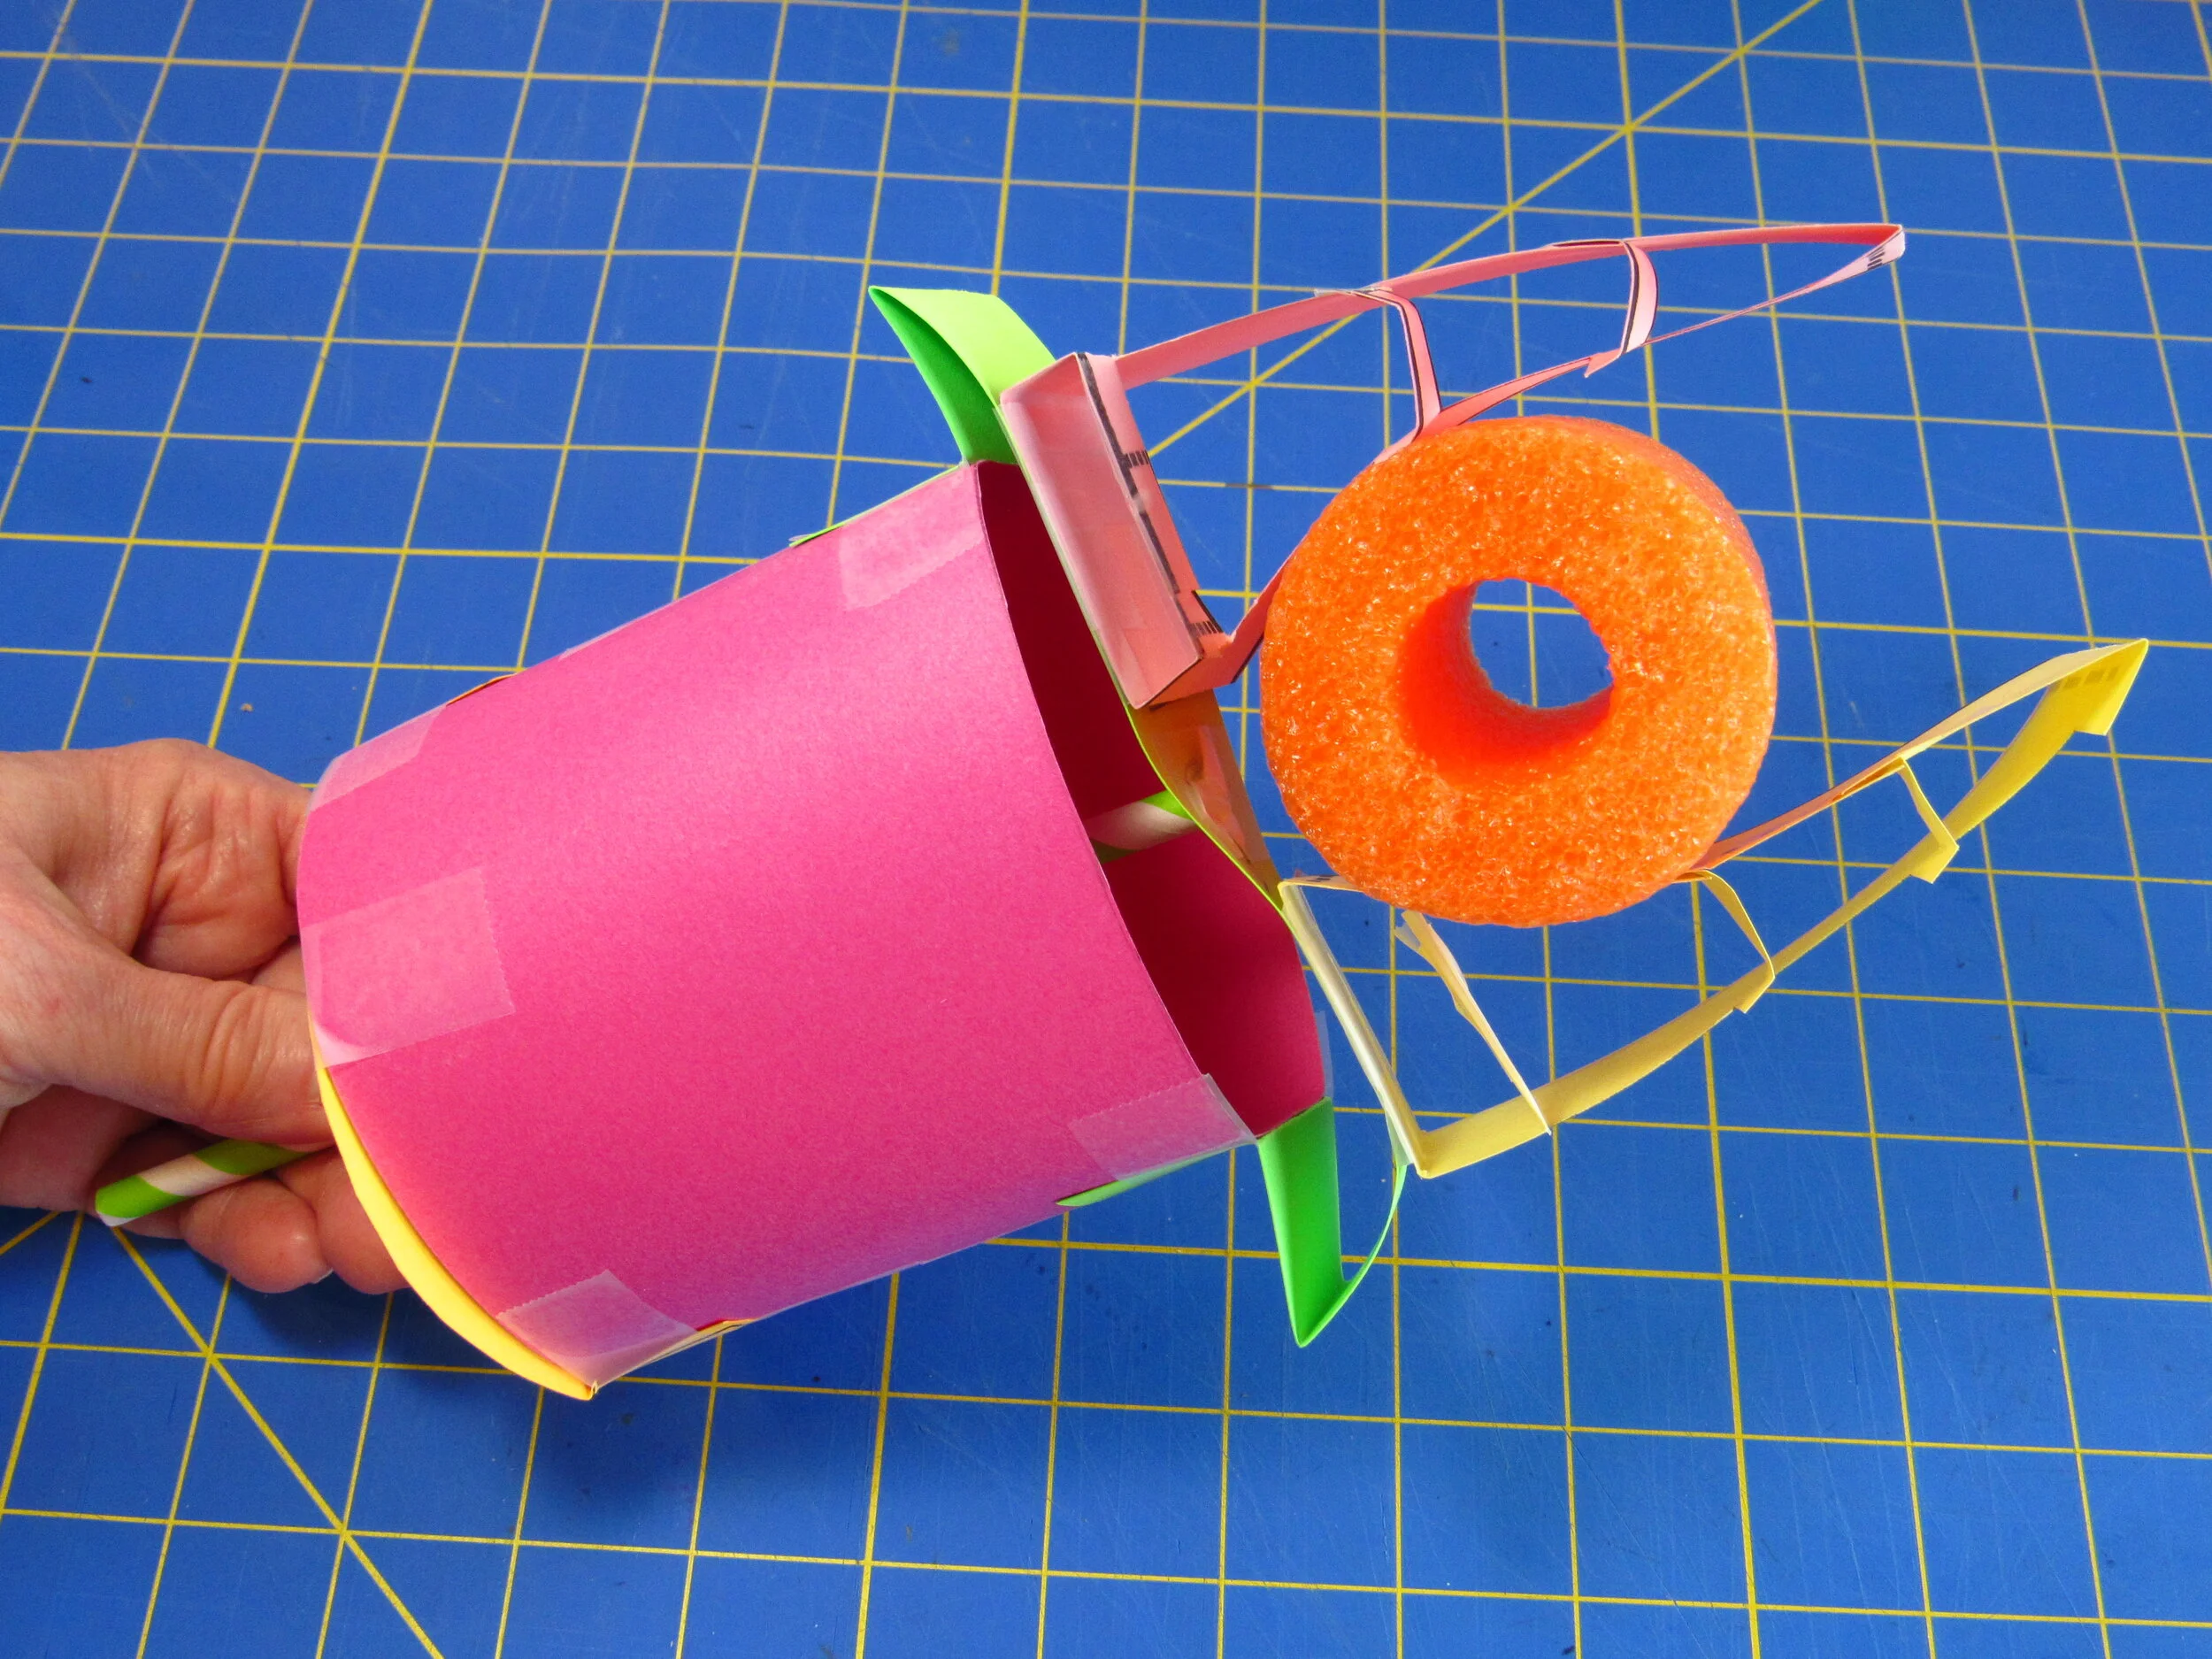
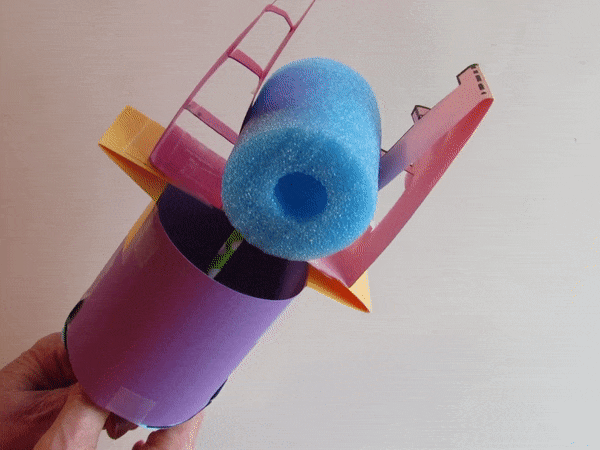
Part 2: Make the Fin Gripper Claw


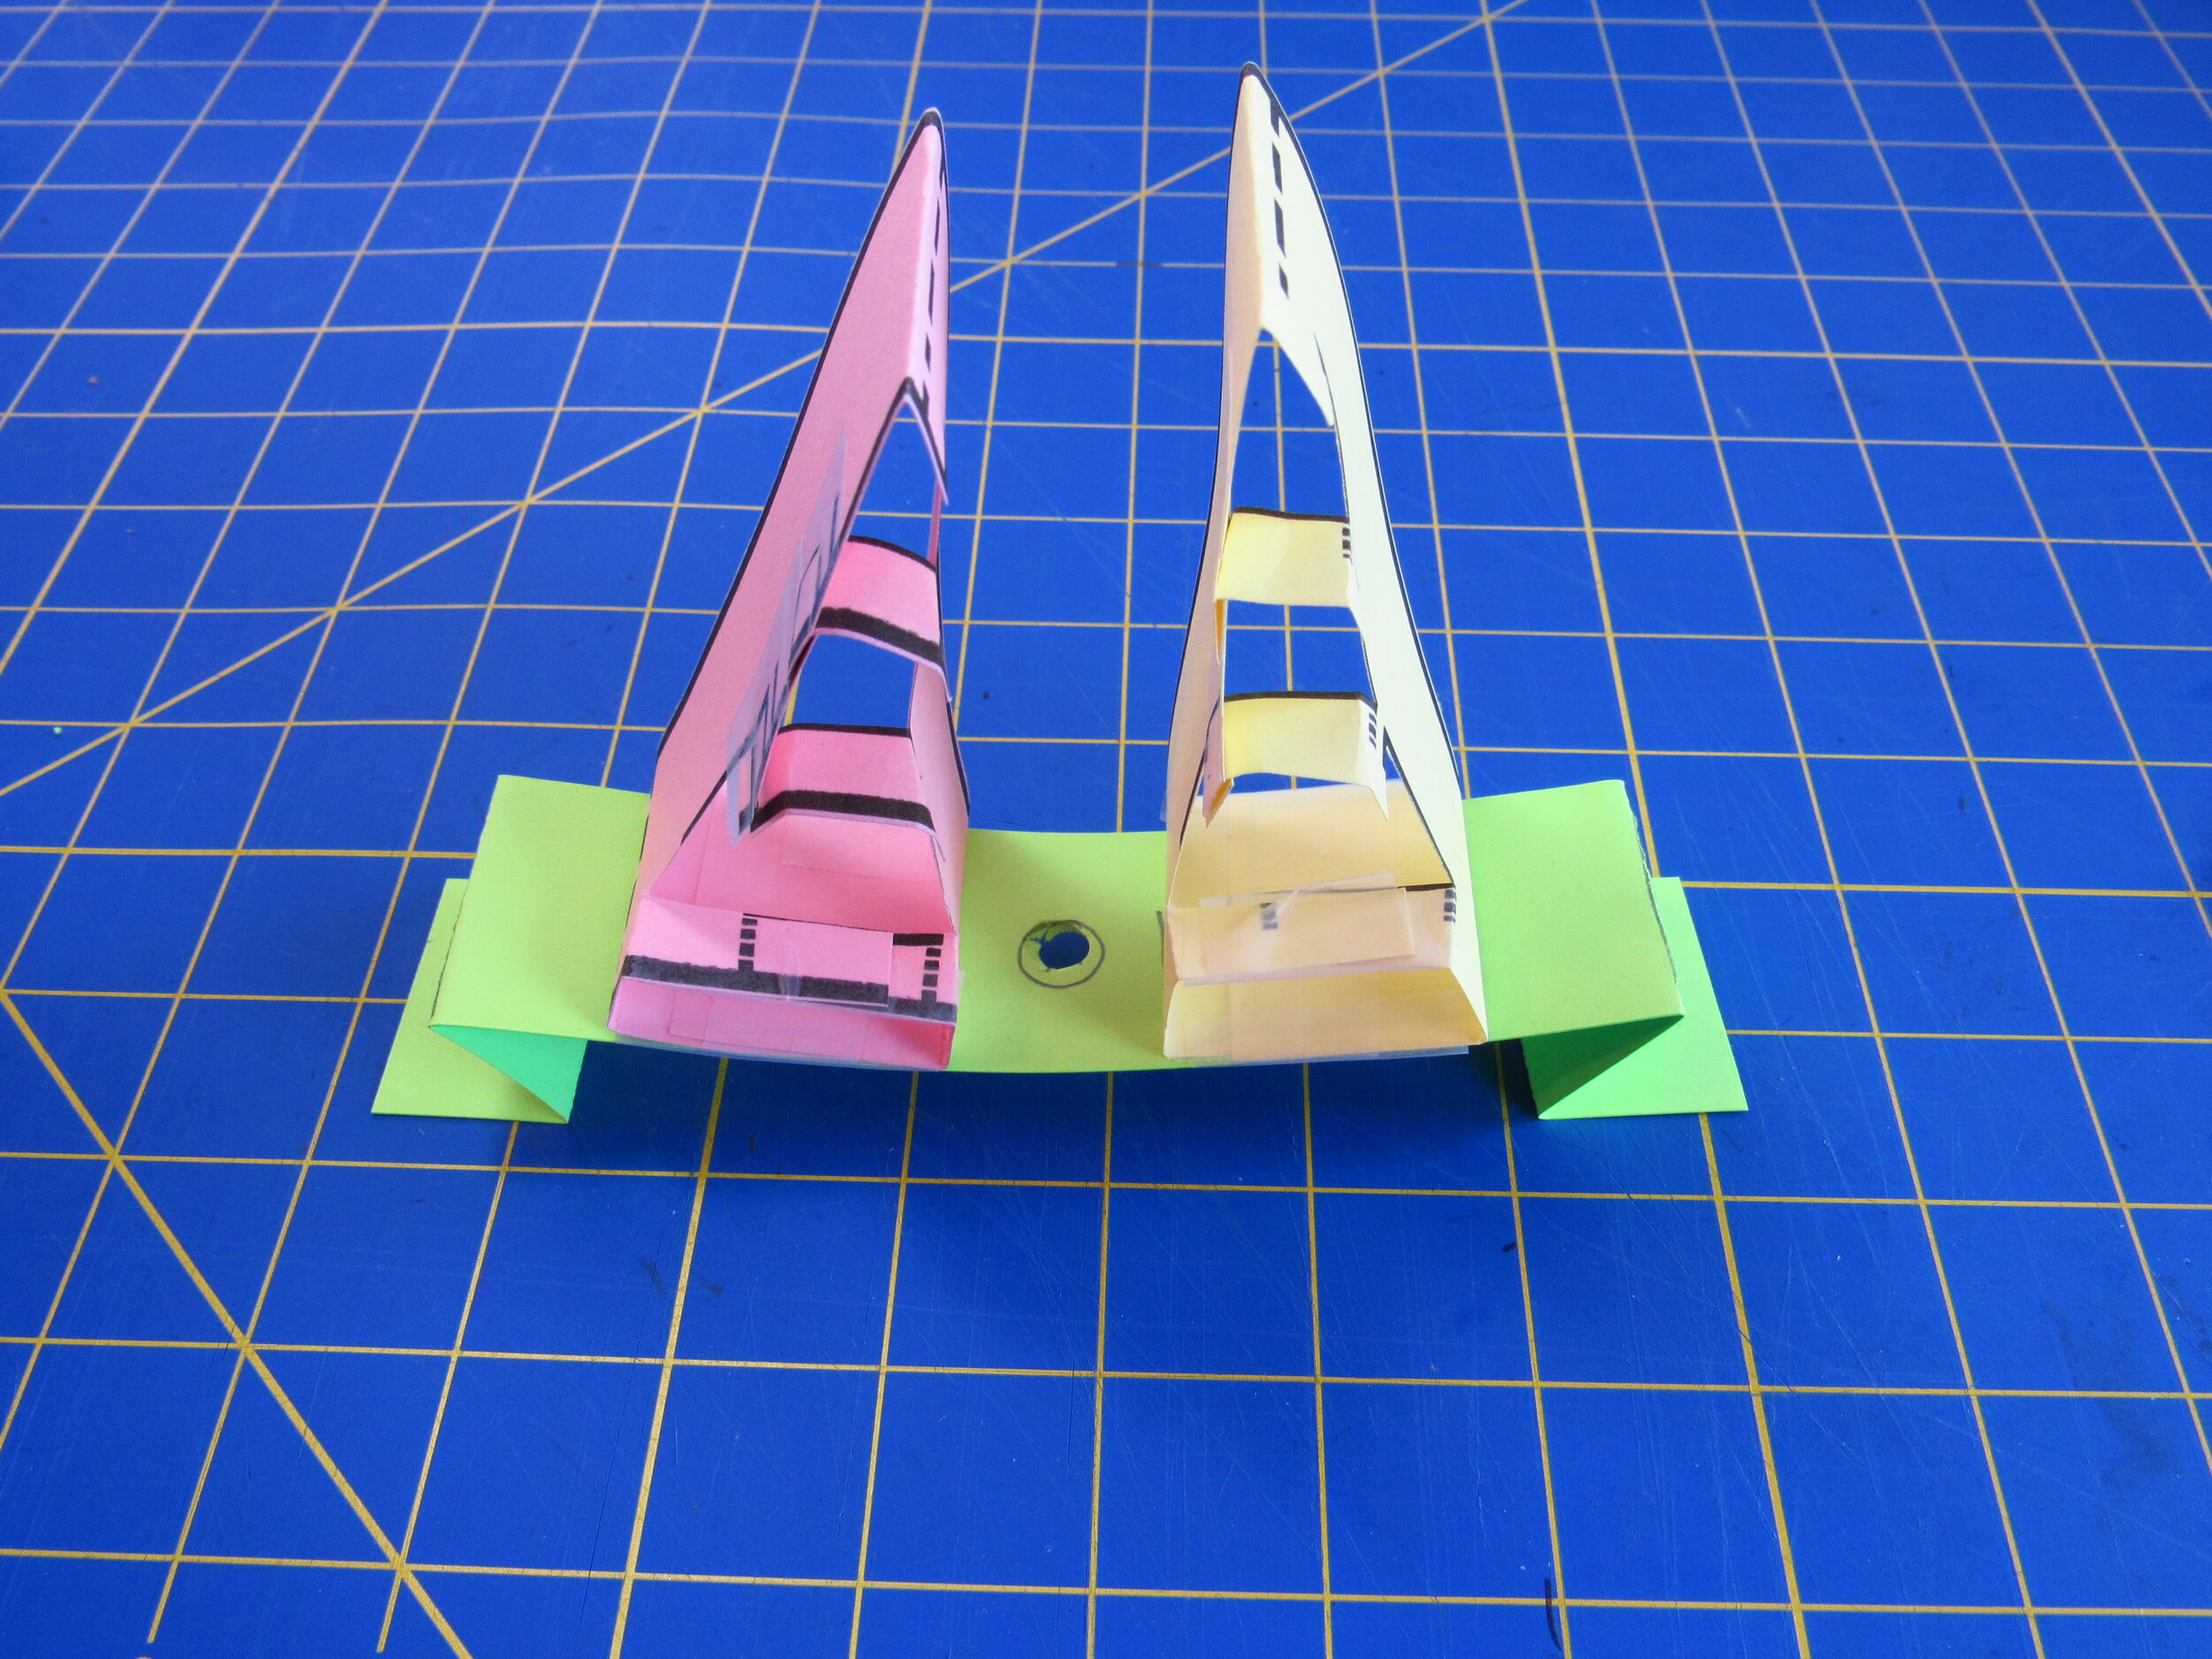


Green = Fin Gripper Fingers Pink = Springy Base Yellow = Tube Sides Blue = Tube Bottom
Supplies
2 fin gripper fingers (see instructions)
cardstock, heavy paper, or thin cardboard — print out templates above on cardstock (both pages), or draw and cut out three pieces:
a strip 1 ½ inches wide and 10 inches long
a strip 4 inches wide by 11 inches long
a circle 3 ½ inches across, with tabs on opposite sides about 1 inch square
scissors
sharp pencil
tape
disposable drinking straw
Instructions
To make a springy base for the fin gripper “fingers,” cut a strip of cardstock about 1.5 inches wide and 10 inches long.
To make accordion (Z-shaped) “springs” at the ends, fold each end in about an inch. Flip the strip over and fold the folded end in about another inch.
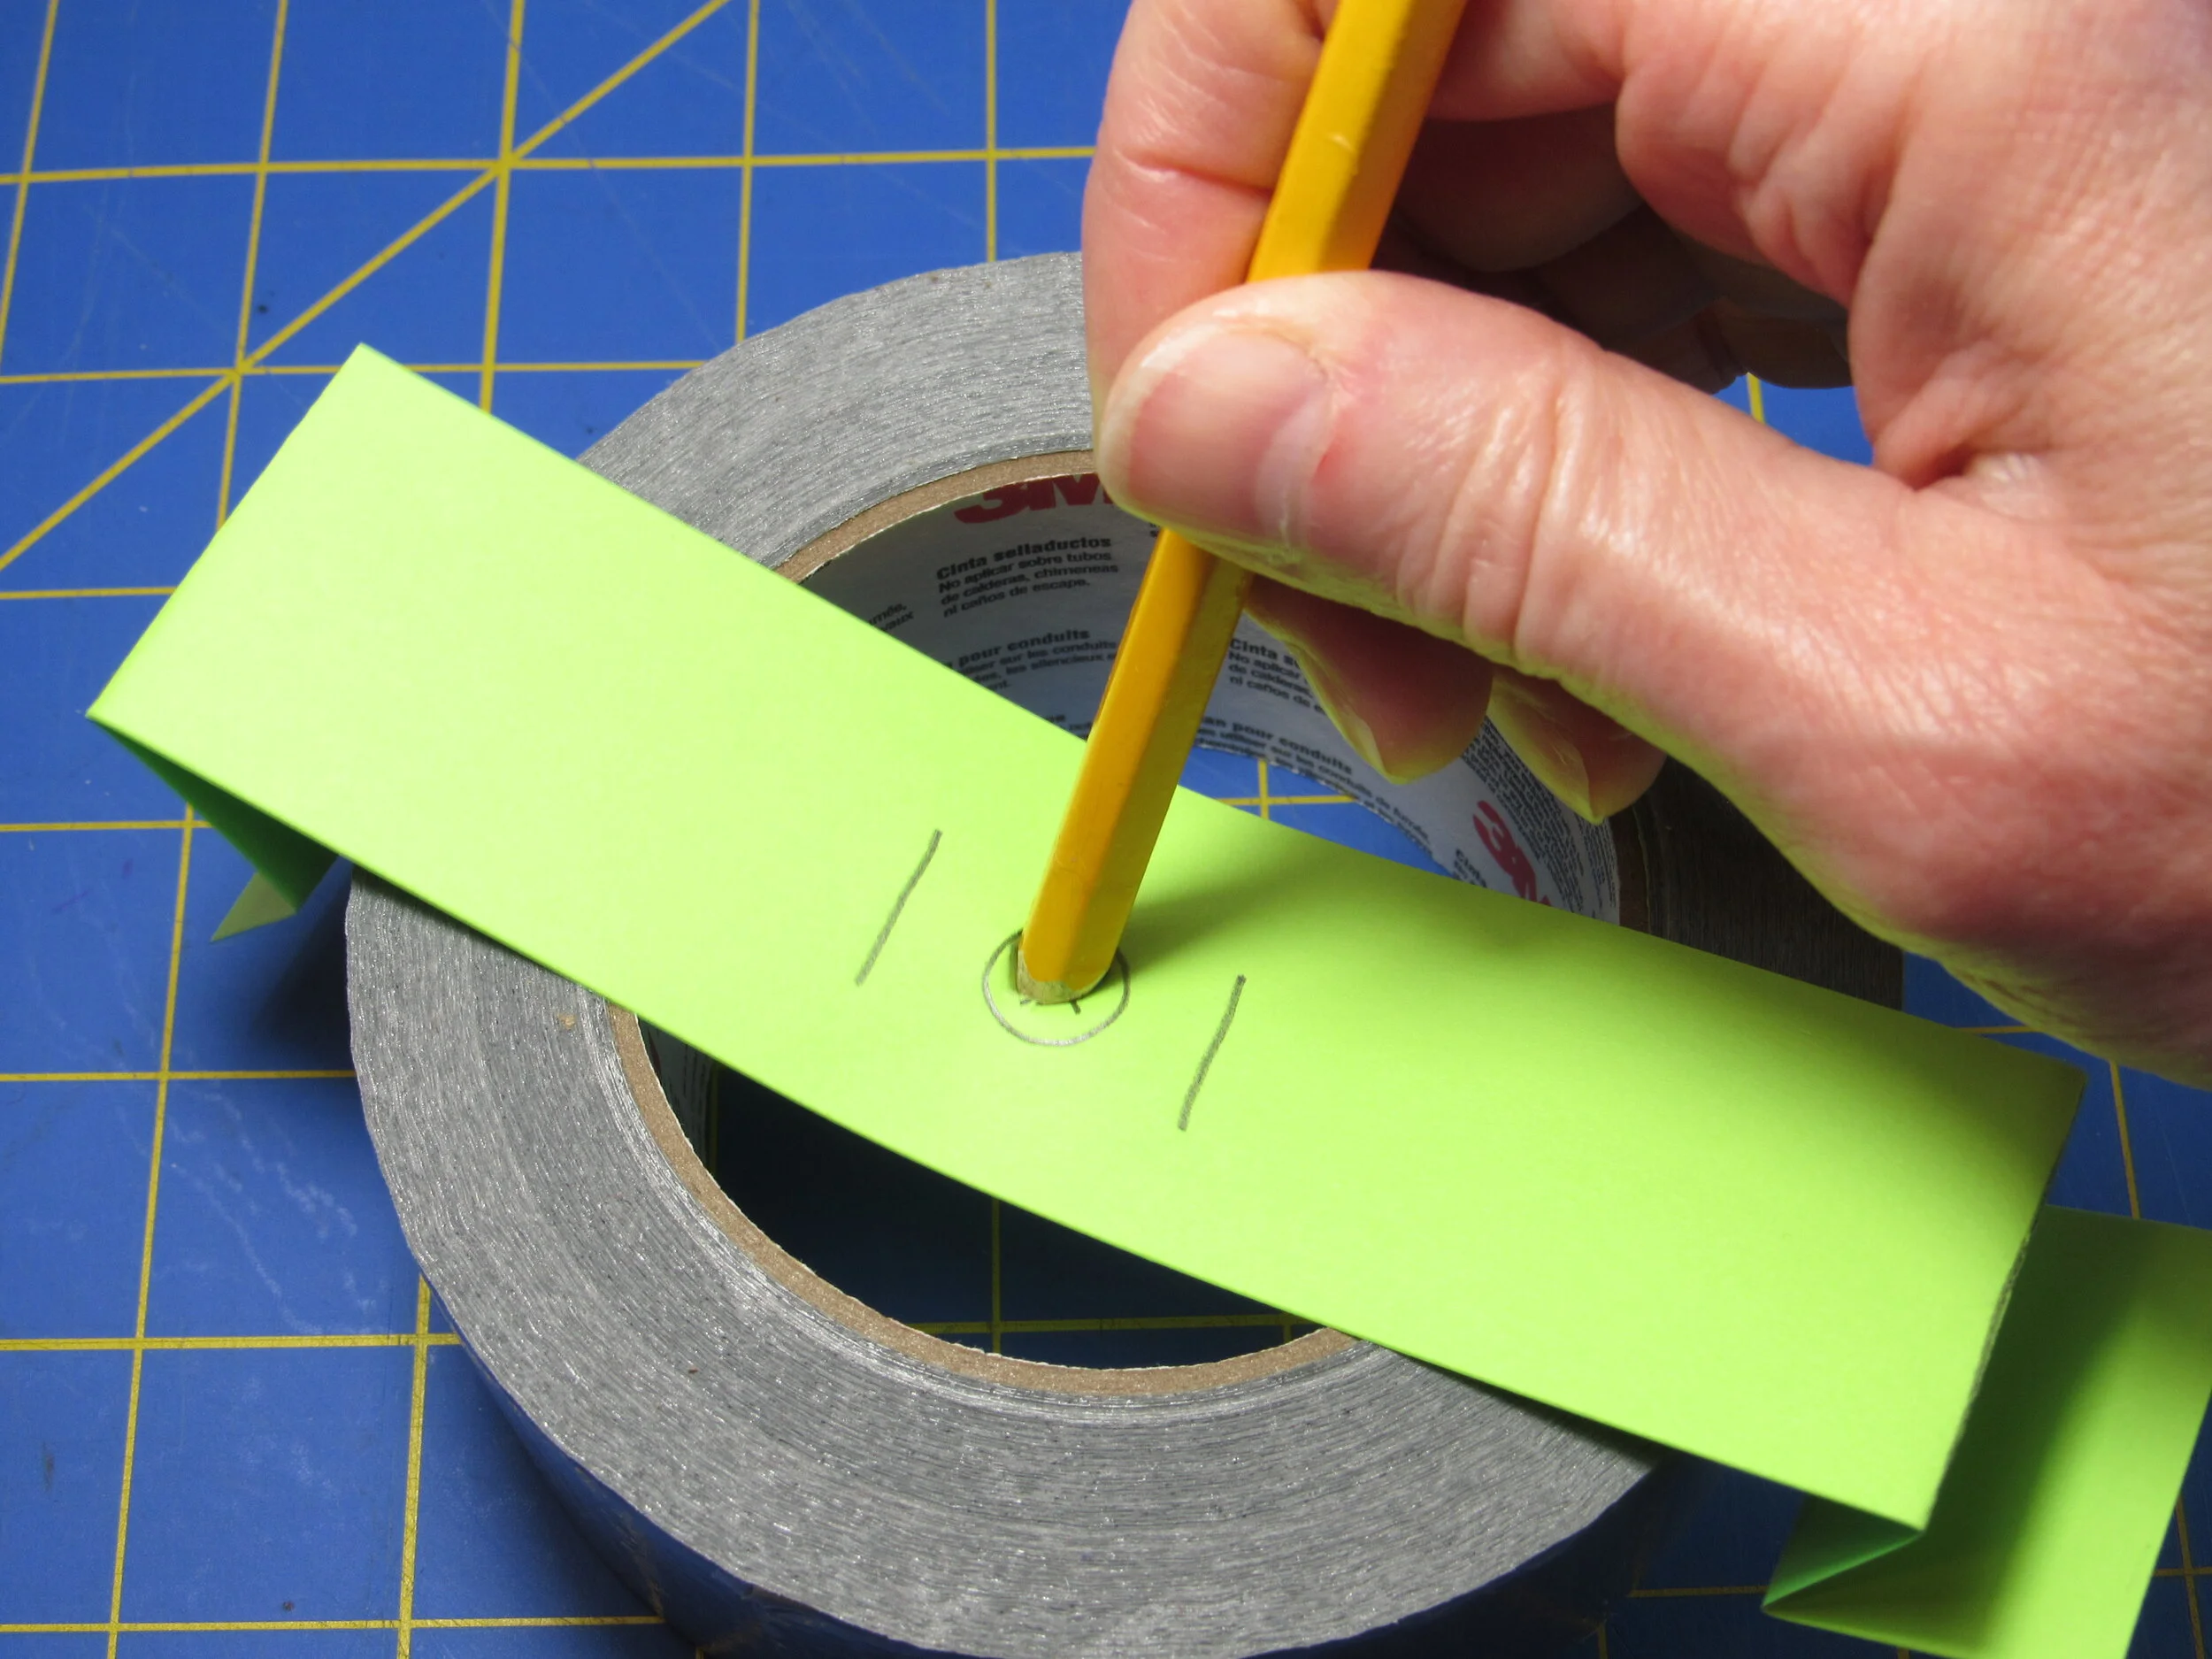
Turn the strip over so the springs are on the bottom. Mark the middle of the strip. Then mark half an inch away from the center on both sides. Poke a hole in the center with a sharp pencil. It helps to rest it on top of a roll of masking tape or a stack of corrugated cardboard.
Tape the fingers onto the strip at the outer marks, with the cross pieces (the ladder rungs) facing you.
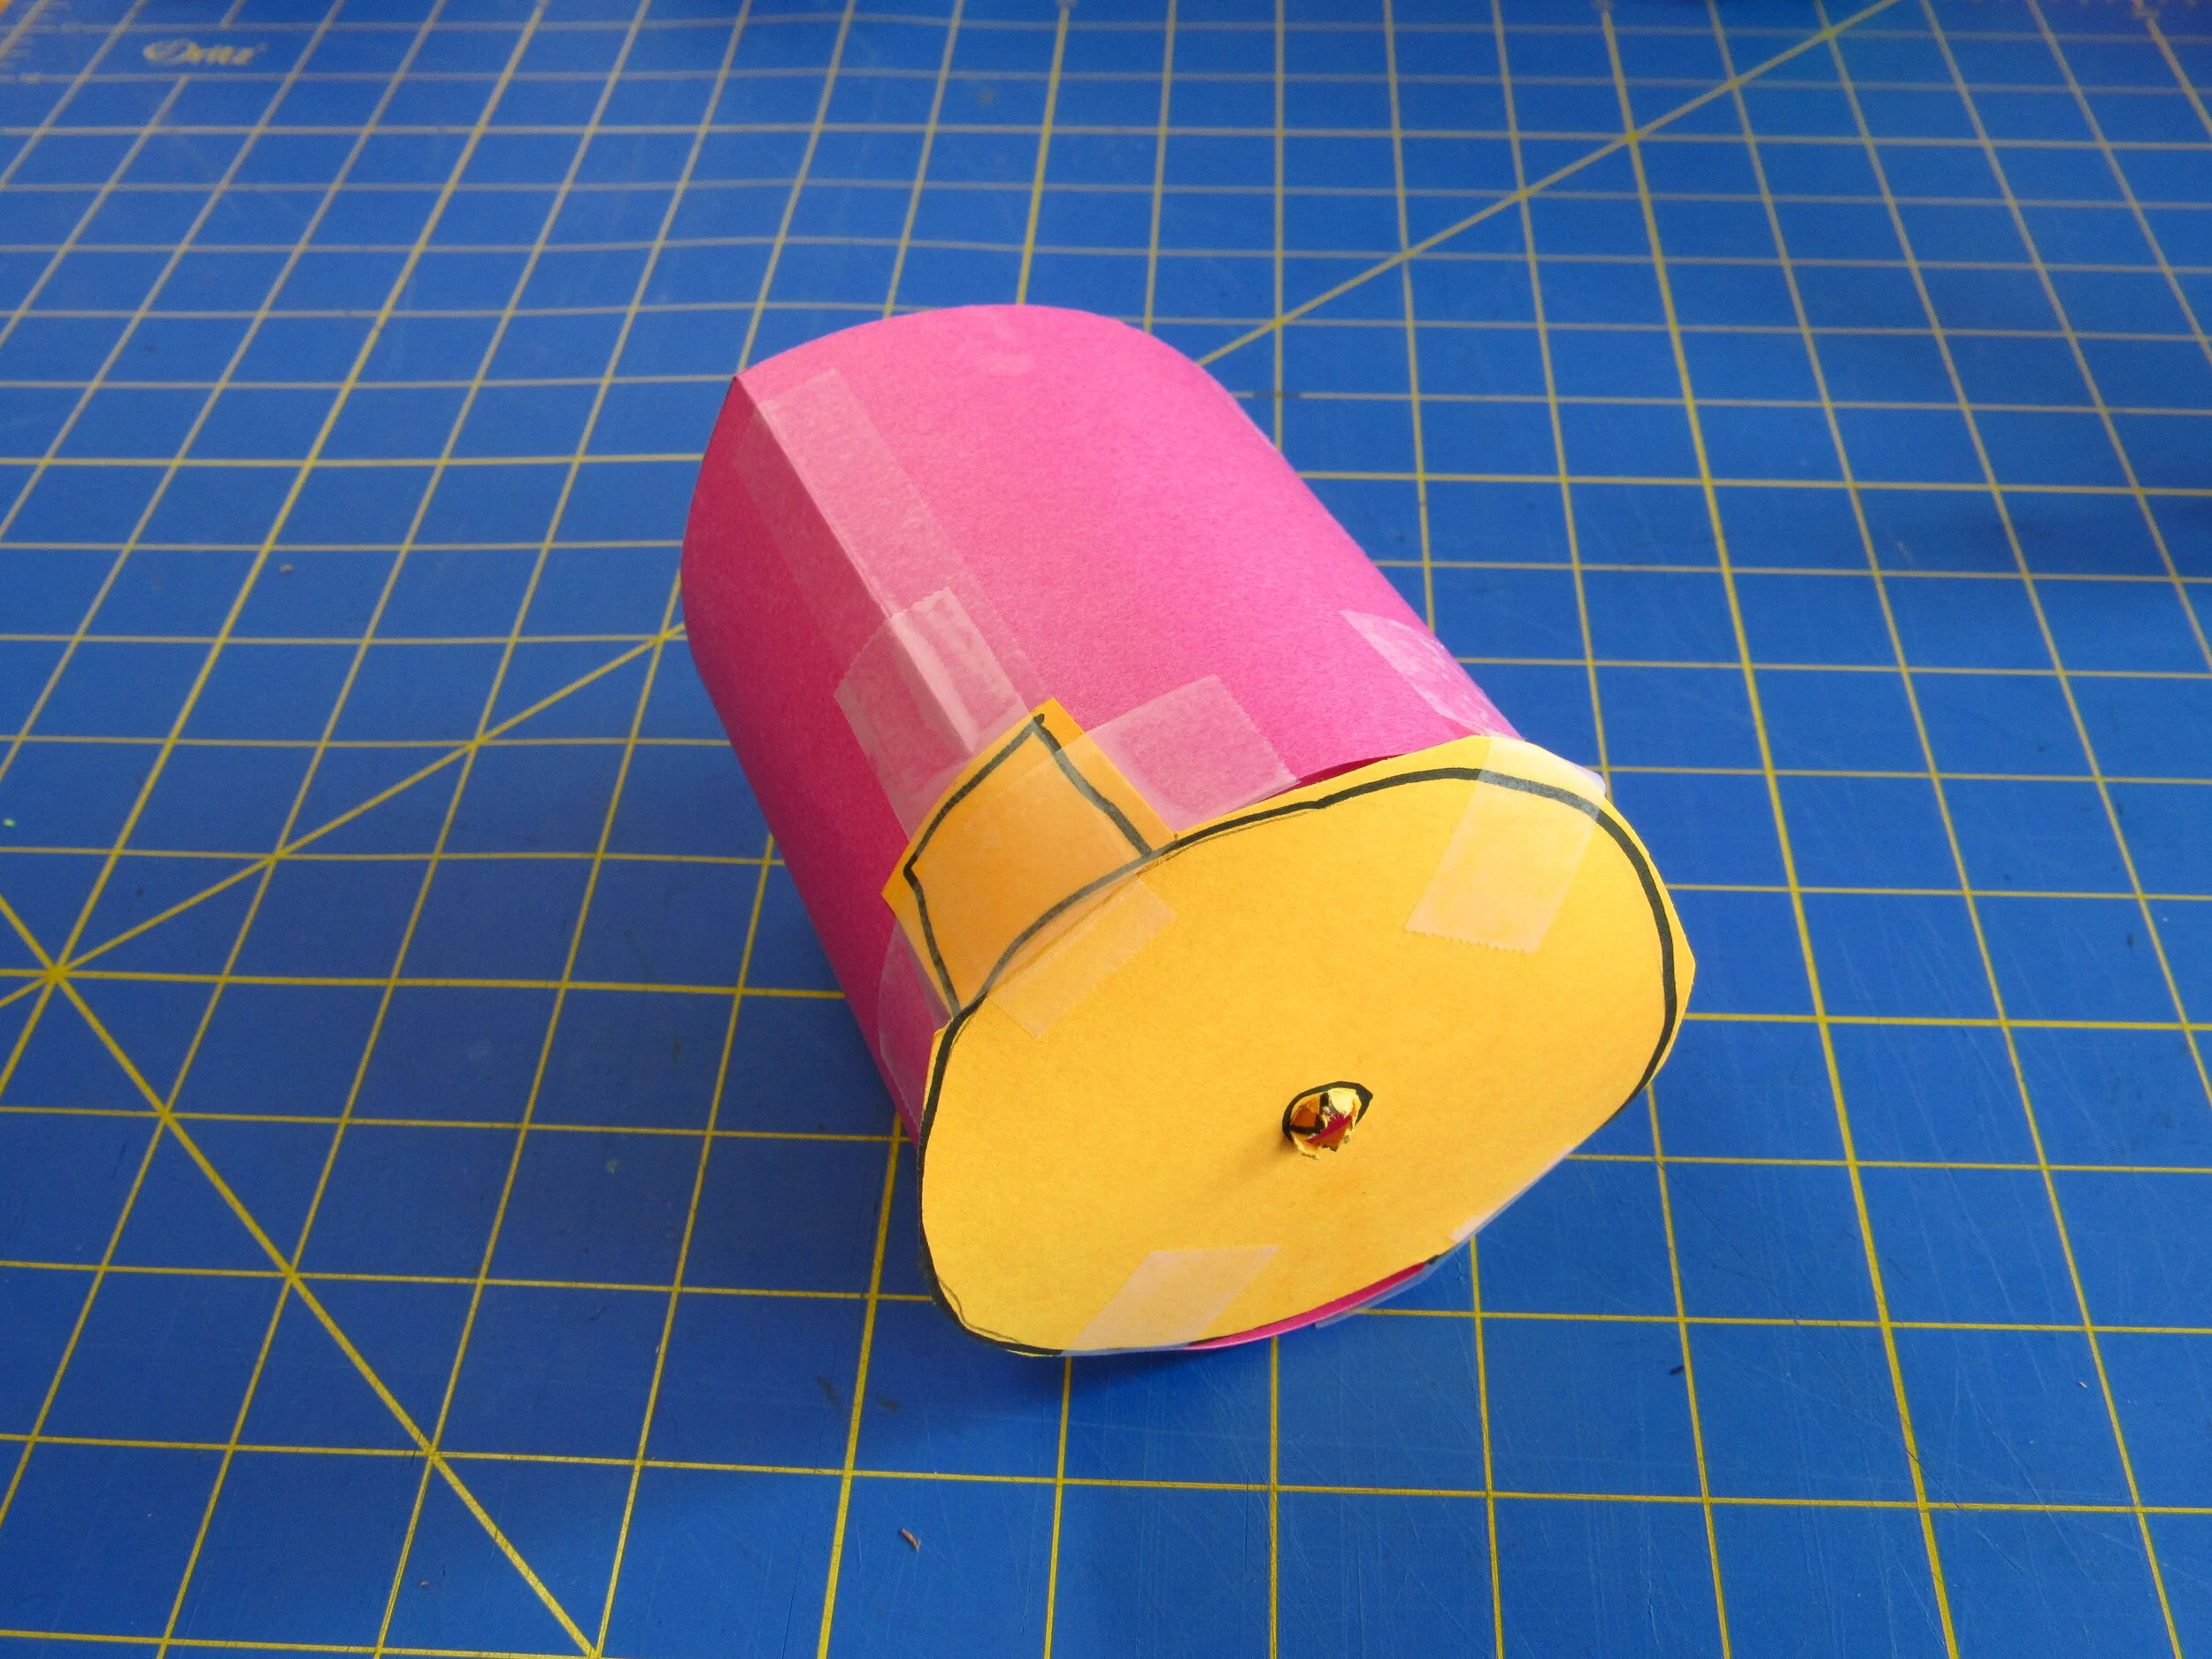
To make the “arm,” cut a strip of cardstock about 4 inches wide and 11 inches long. Tape the short ends together to make a tube.
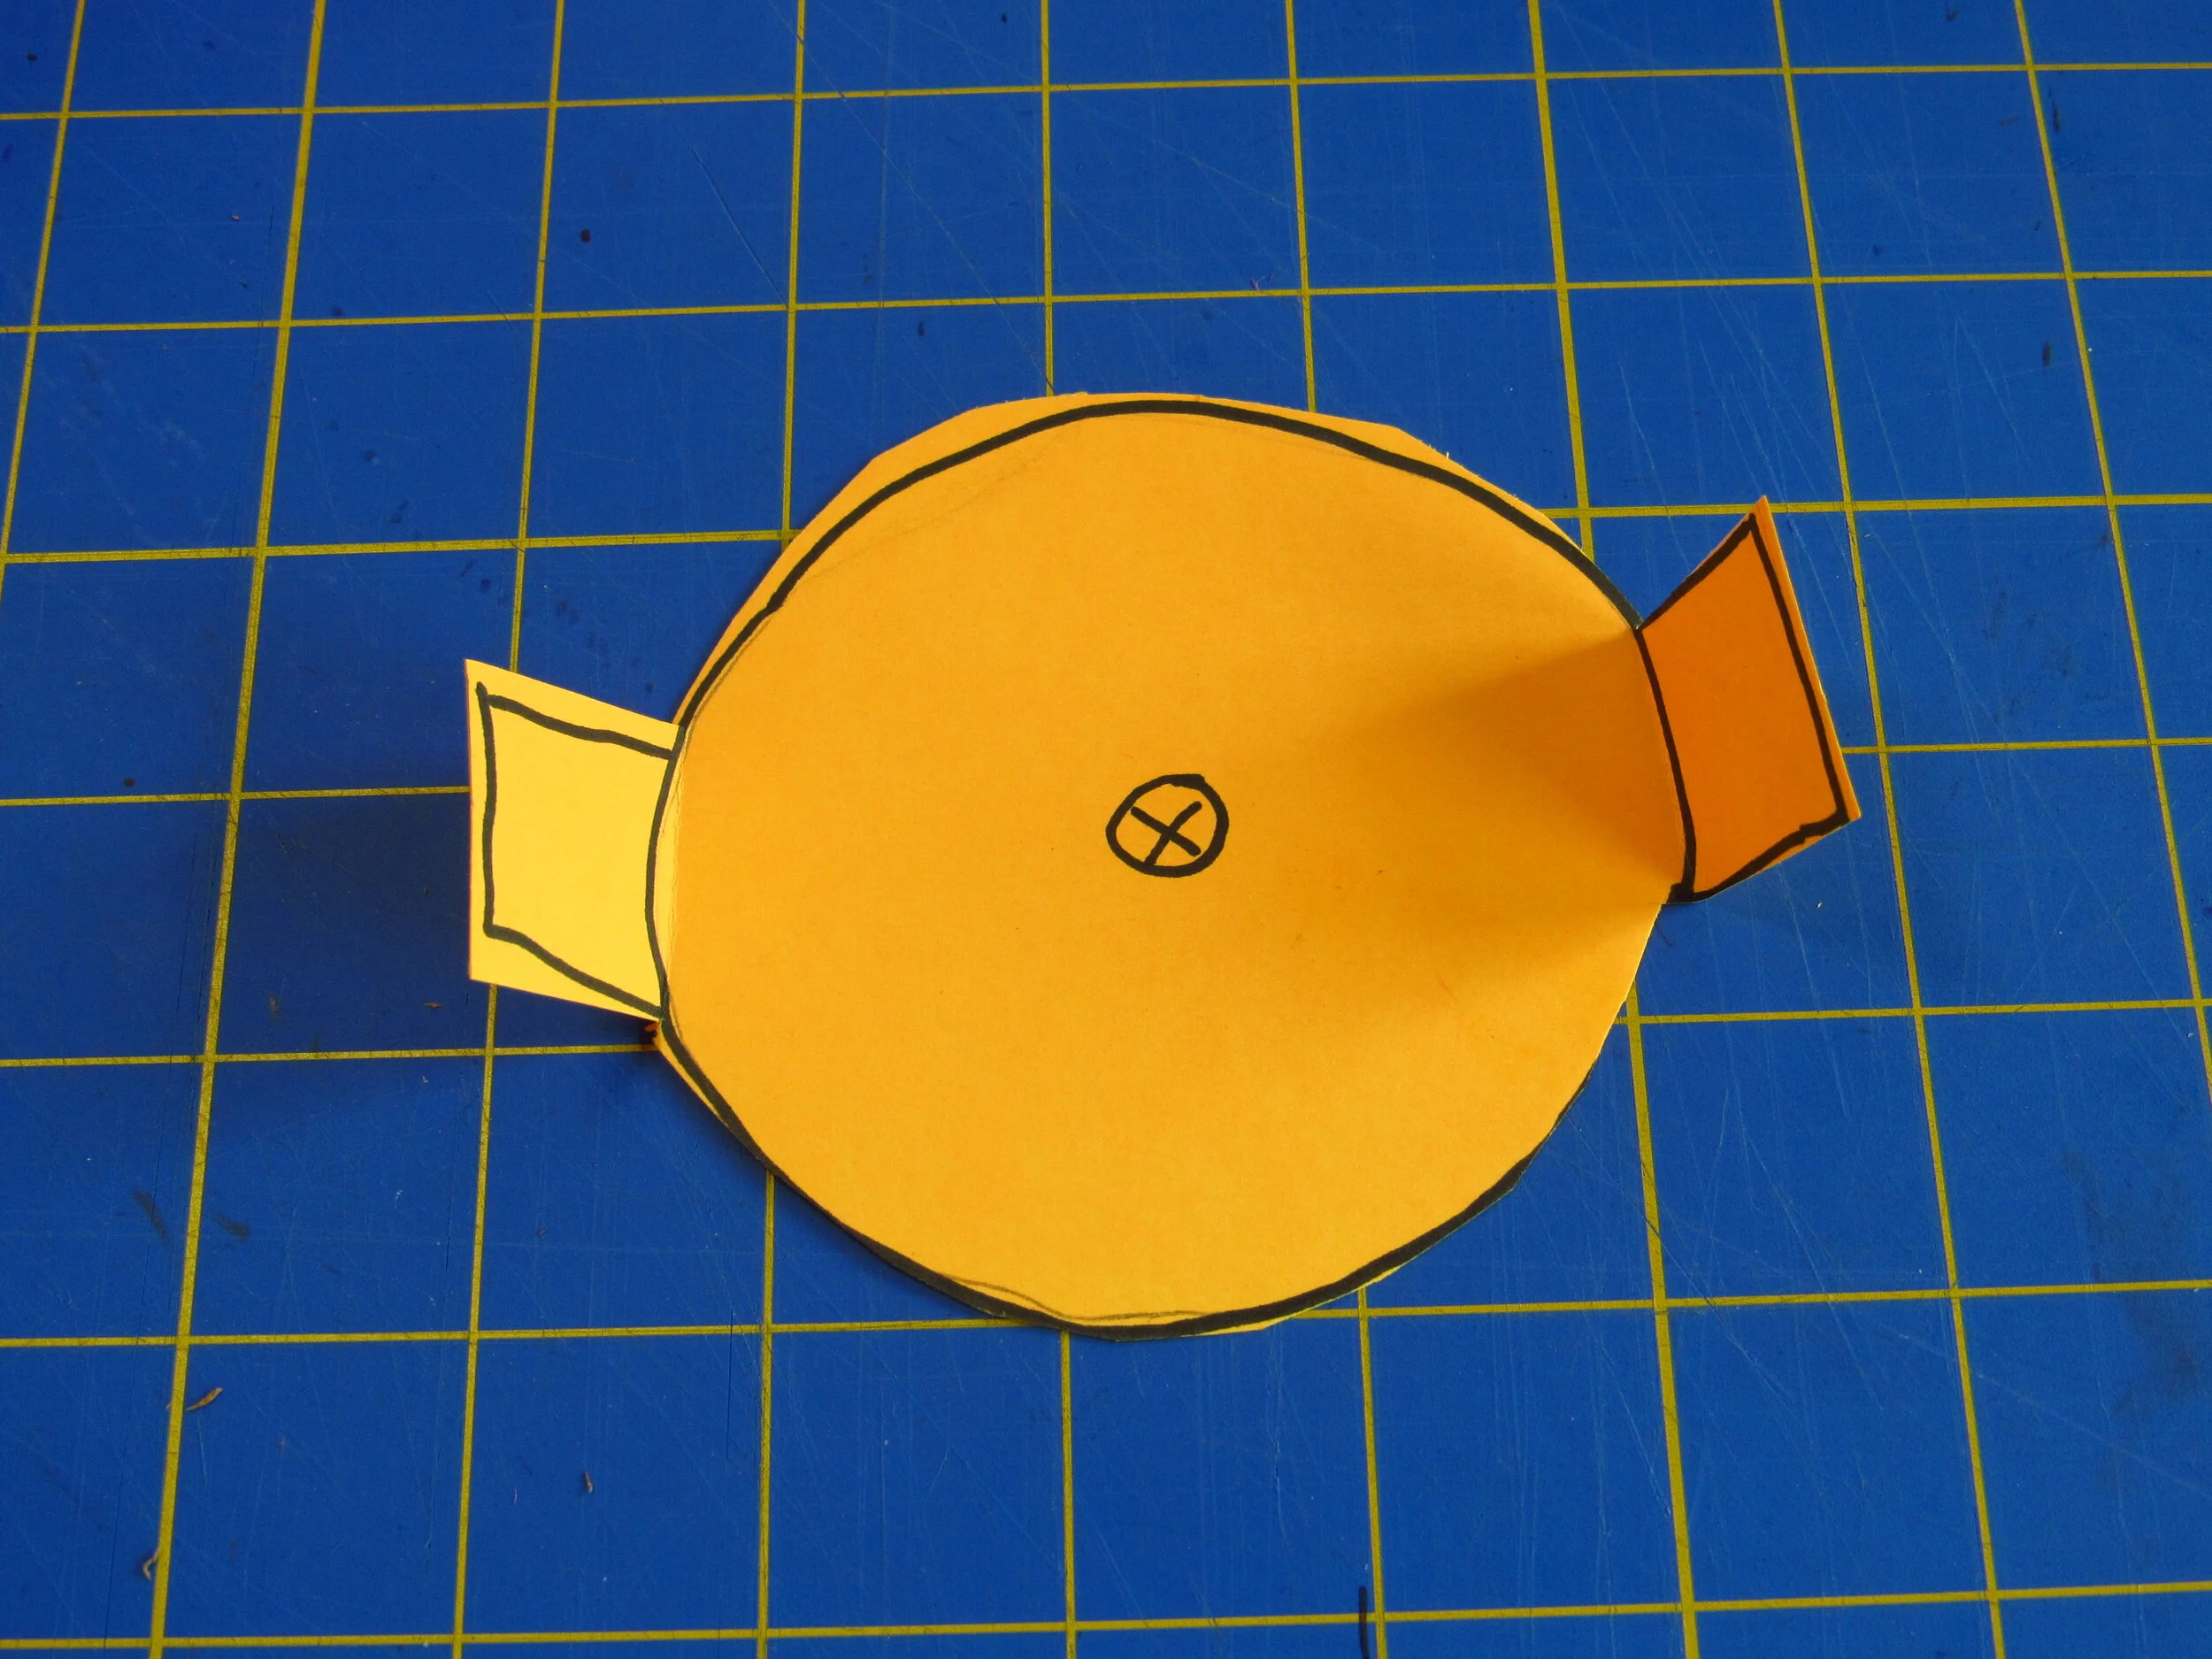
To make a bottom for the tube, trace around the tube on another piece of cardstock. Draw two tabs on opposite sides, about 1 inch square. They will look like “ears.” Cut out the whole shape. Fold the tabs up. Then make a pencil-sized hole in the center of the round piece the same way you did with the strip. Tape the bottom onto the tube, with one tab over the seam in the tube.
Take a paper straw and cut three snips around end to create tabs. Fold the tabs back like the petals of a flower.
Insert the straw through the hole in the base strip so the tabs rest on top, between the fin gripper fingers. Tape the straw tabs to the strip to hold the straw in place.
Insert the bottom of the straw into the tube and out through the hole in the circle. Tape the ends of the strip to the tube, with one end over the seam in the tube. The springy base will curve up and leave a little space between the strip and the top of the tube.
To close the claw, hold it by the arm and pull the straw down.
Fin Gripper Challenge — Design Your Own Claw!

See if you can make a claw with three or more fingers!
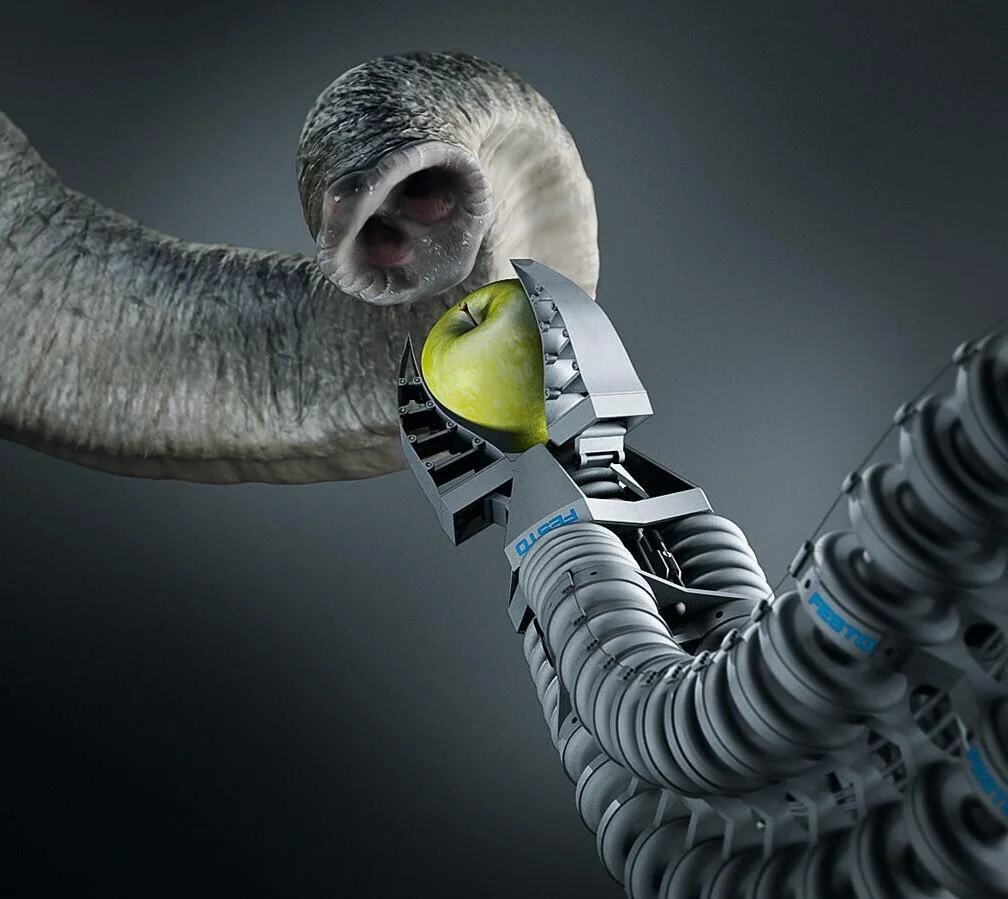
Or, build a flexible arm for your claw like the Festo “elephant trunk.”

Want More Great STEAM Projects?
Check out my book BOTS! from Nomad Press
Look for more free activities you can do at home on my Projects page