Make a Multi-Servo Paper Plate Tilt Maze Game!


Use two micro:bits with two servos and two controllers to tilt the plate so the ball rolls to the finish.
For more challenge, add a third micro:bit that sends radio signals to the first two!
Build Instructions


Make a base. Use a heavy-duty paper plate or heavy cardboard.
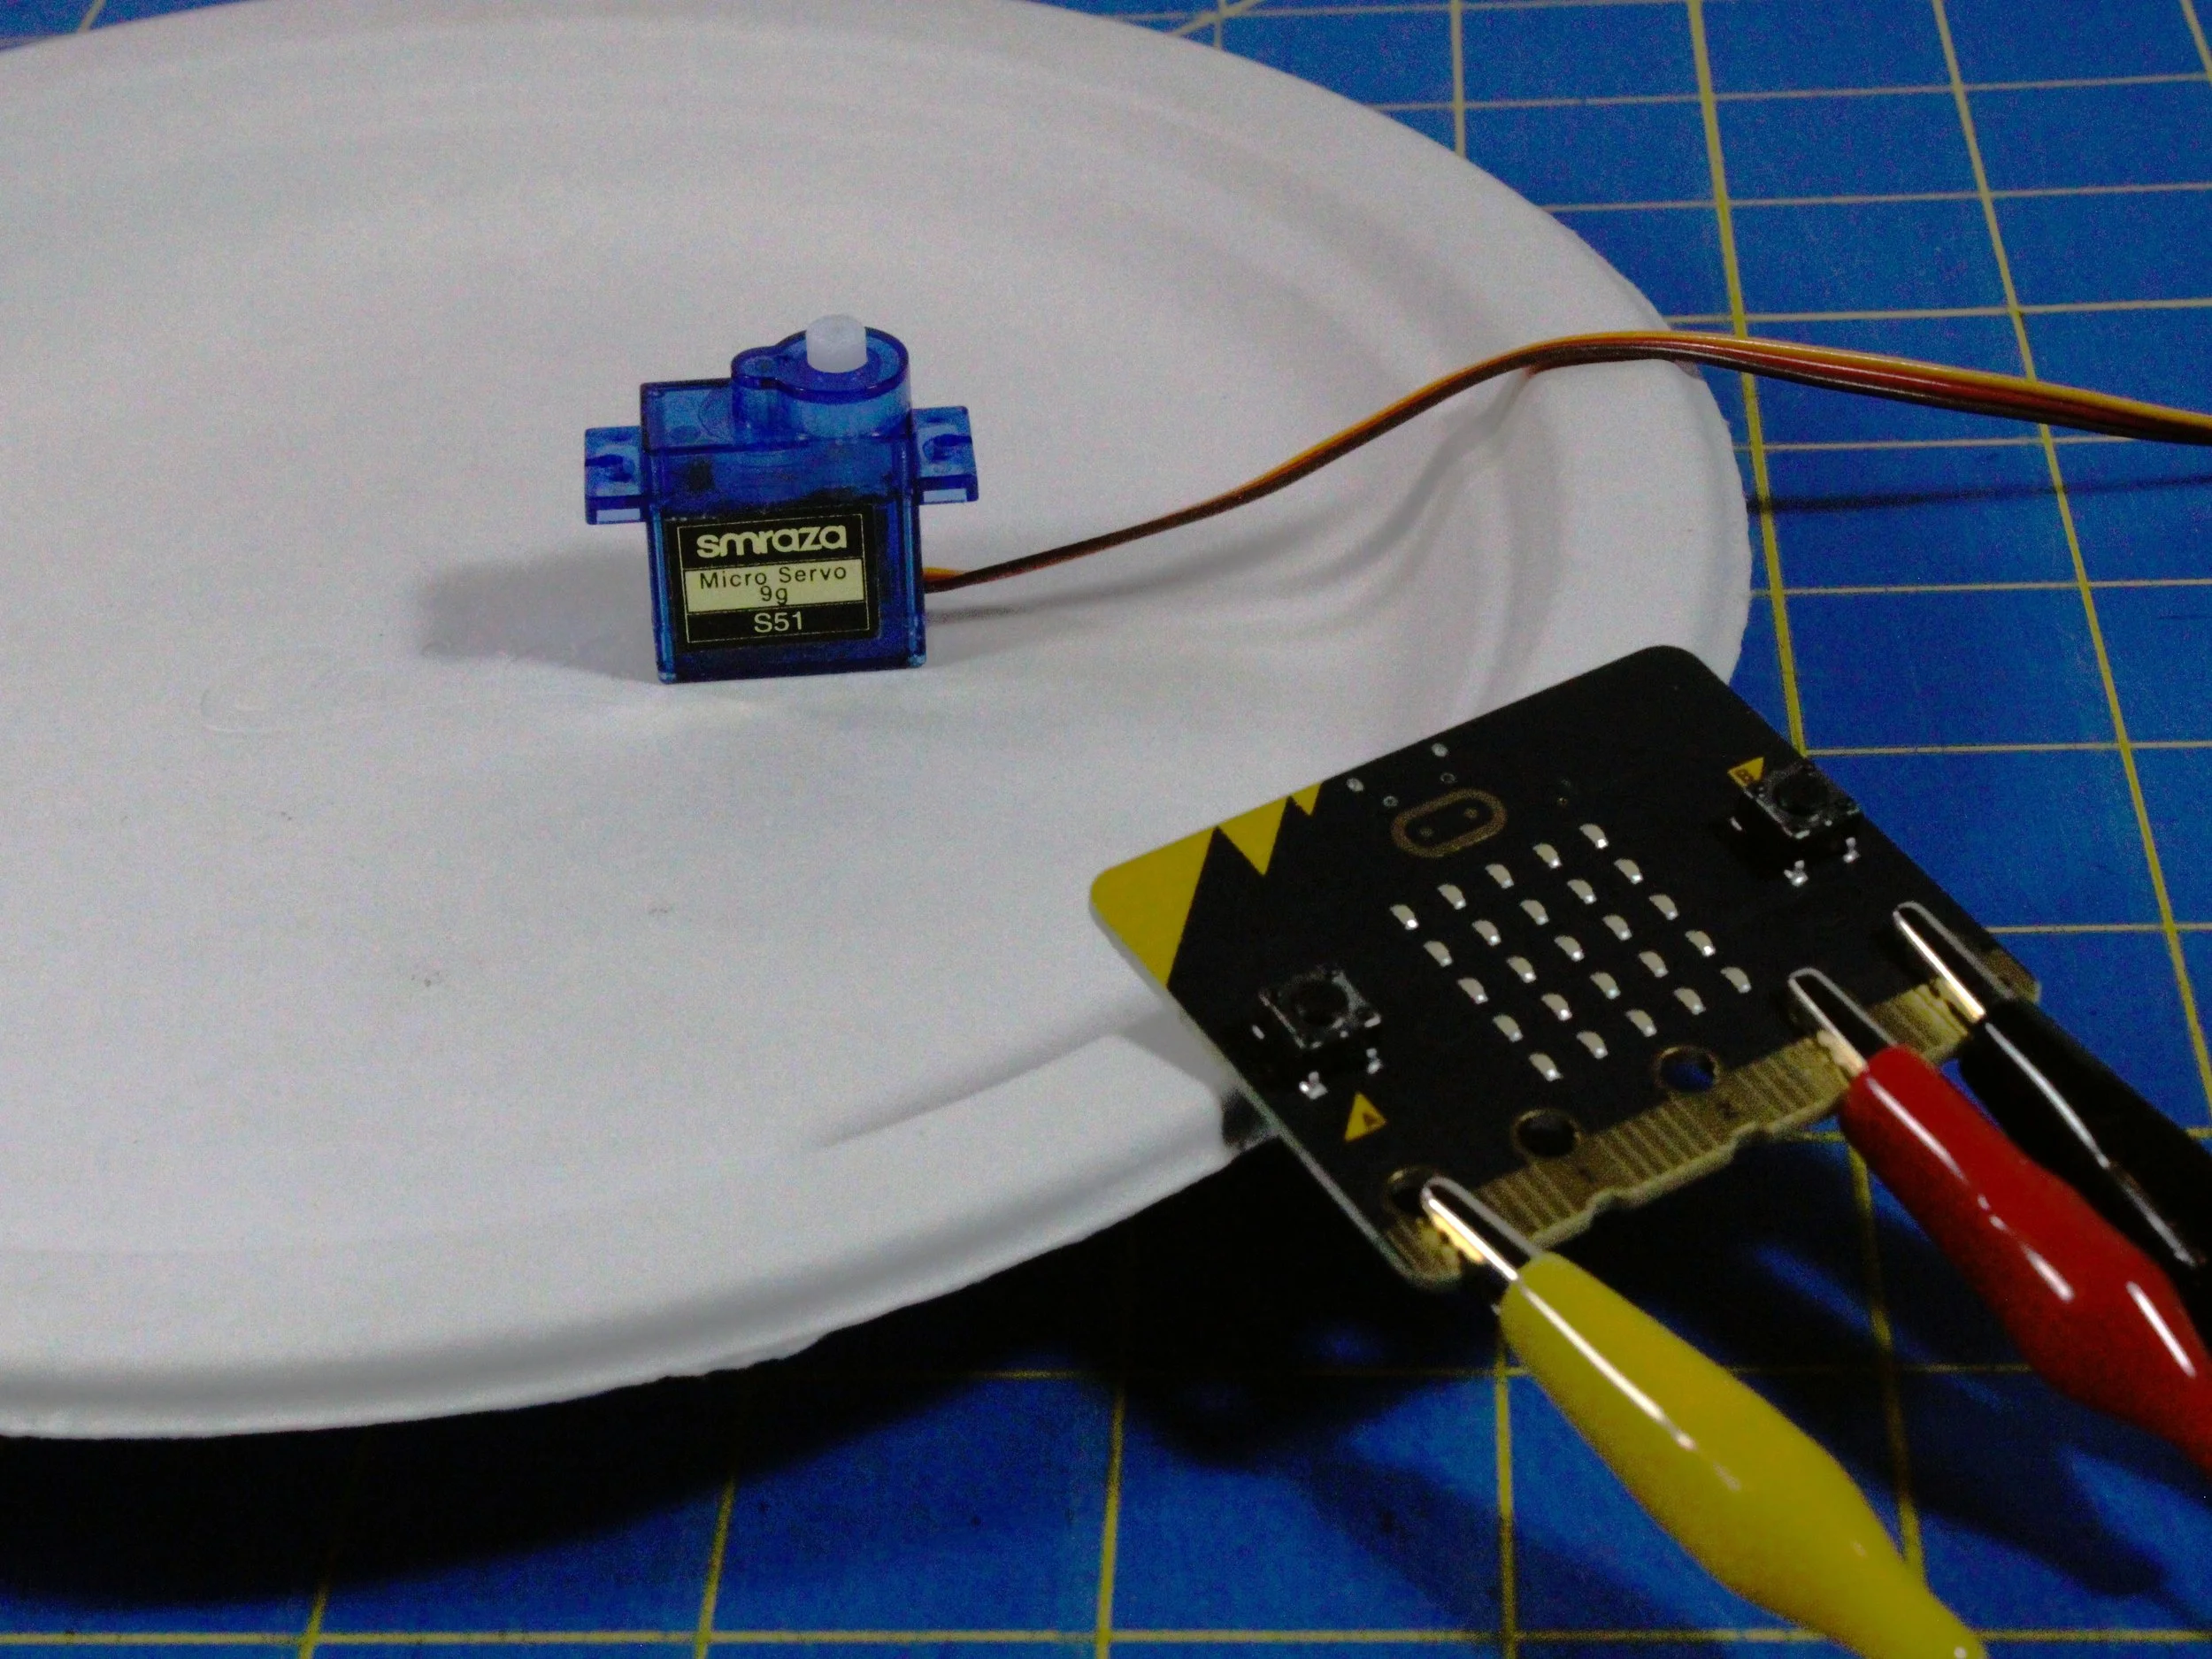
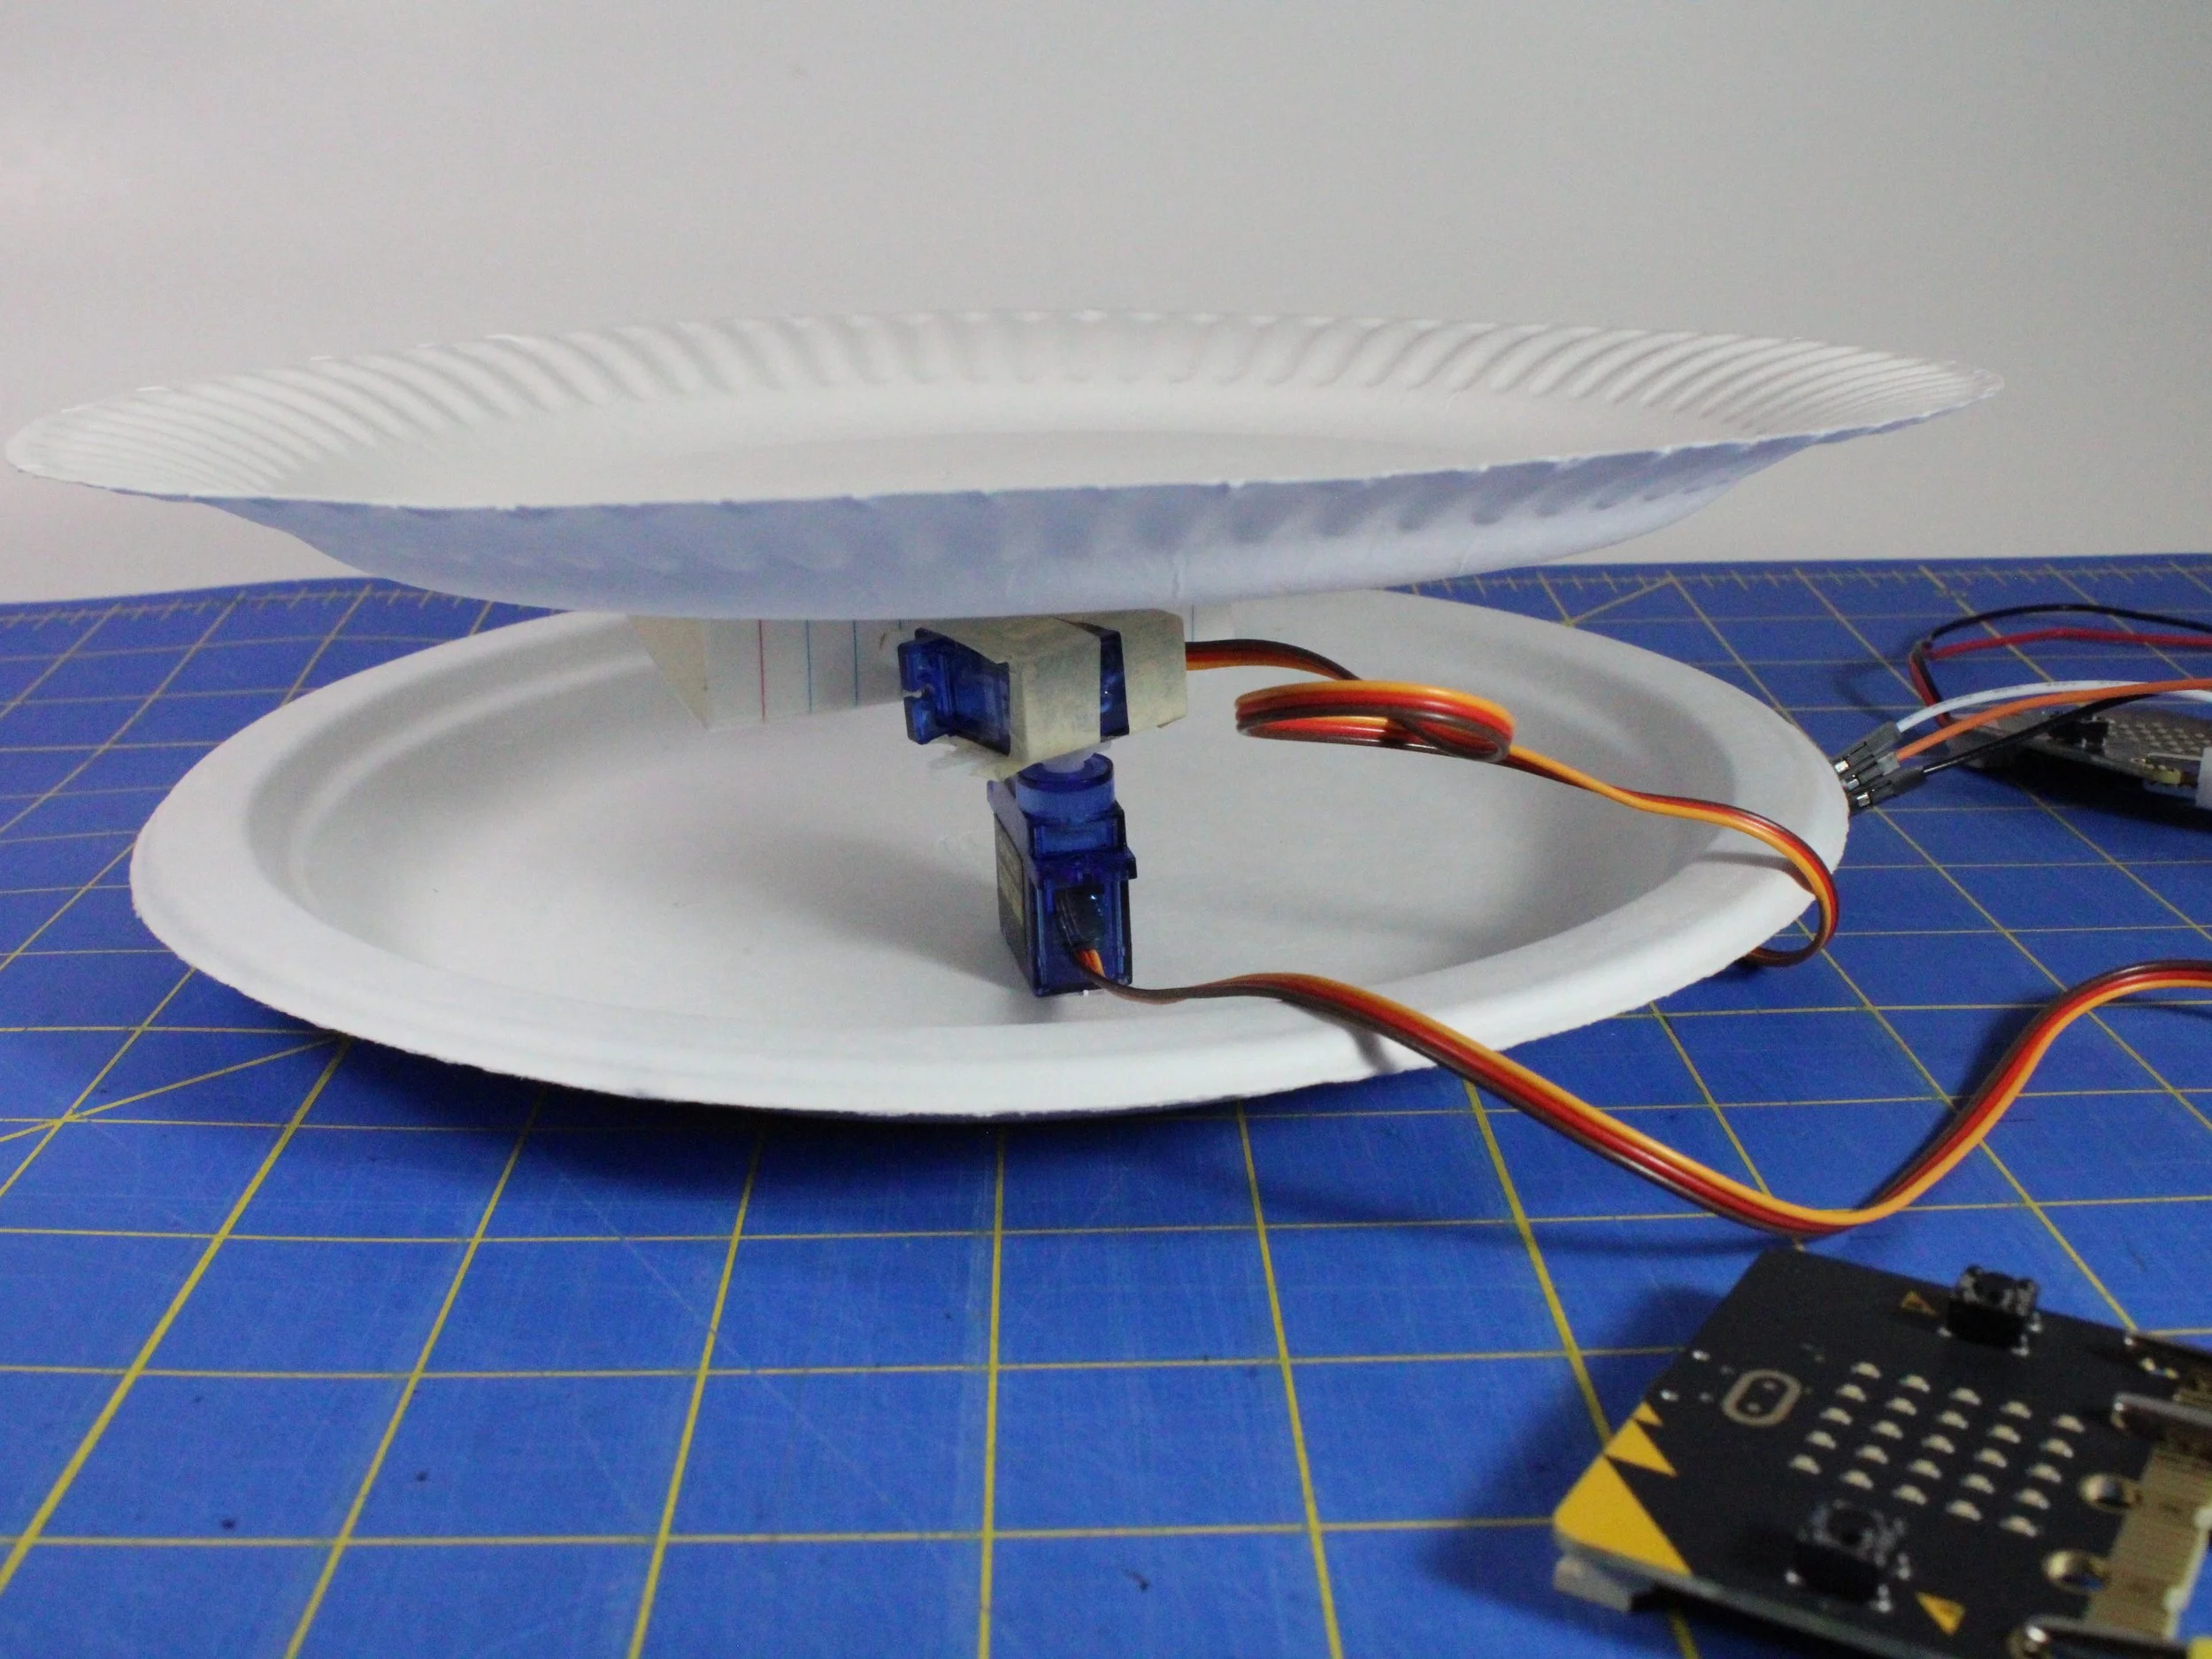
Use double-sided tape to attach the first servo motor (the swivel motor) to the base near the edge, standing up. Point the wires towards the edge.
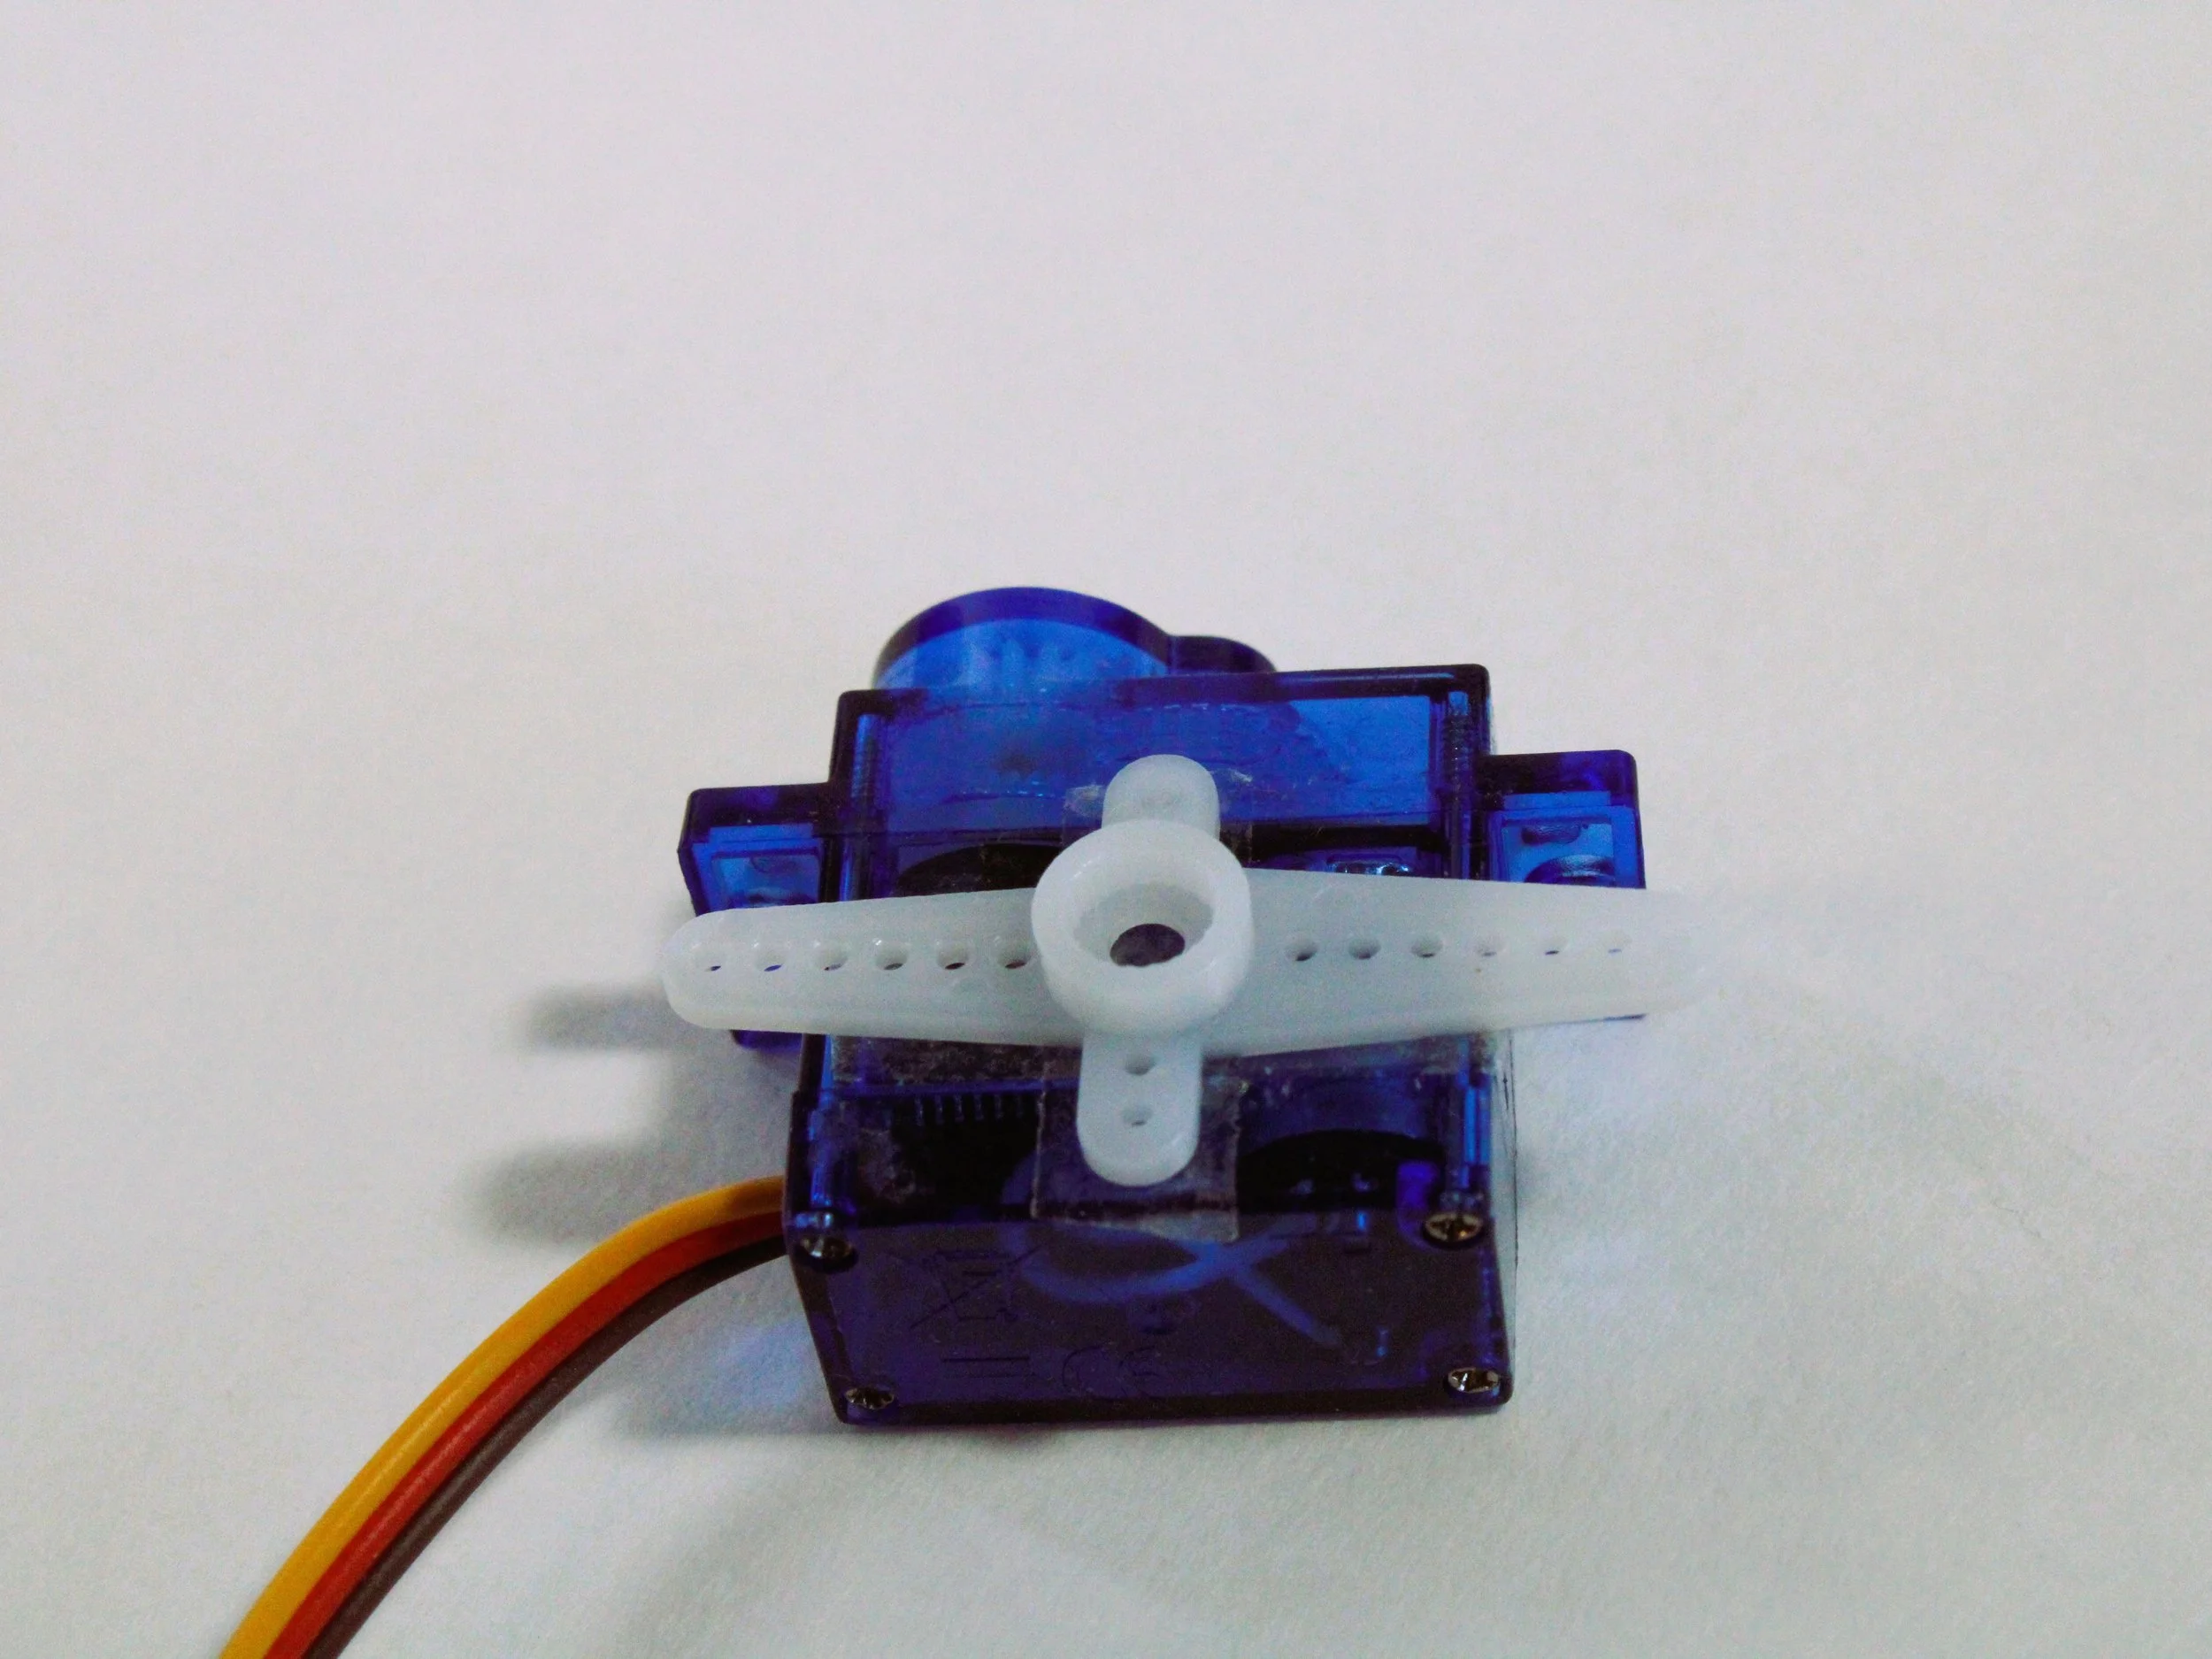
Attach a long servo horn (with a cross piece, if available) to the side of the second servo motor with double-sided tape. Reinforce with masking tape.
Snap the servo horn onto the first servo. Point the wires towards the edge. This is the pivot motor, which tilts the maze.
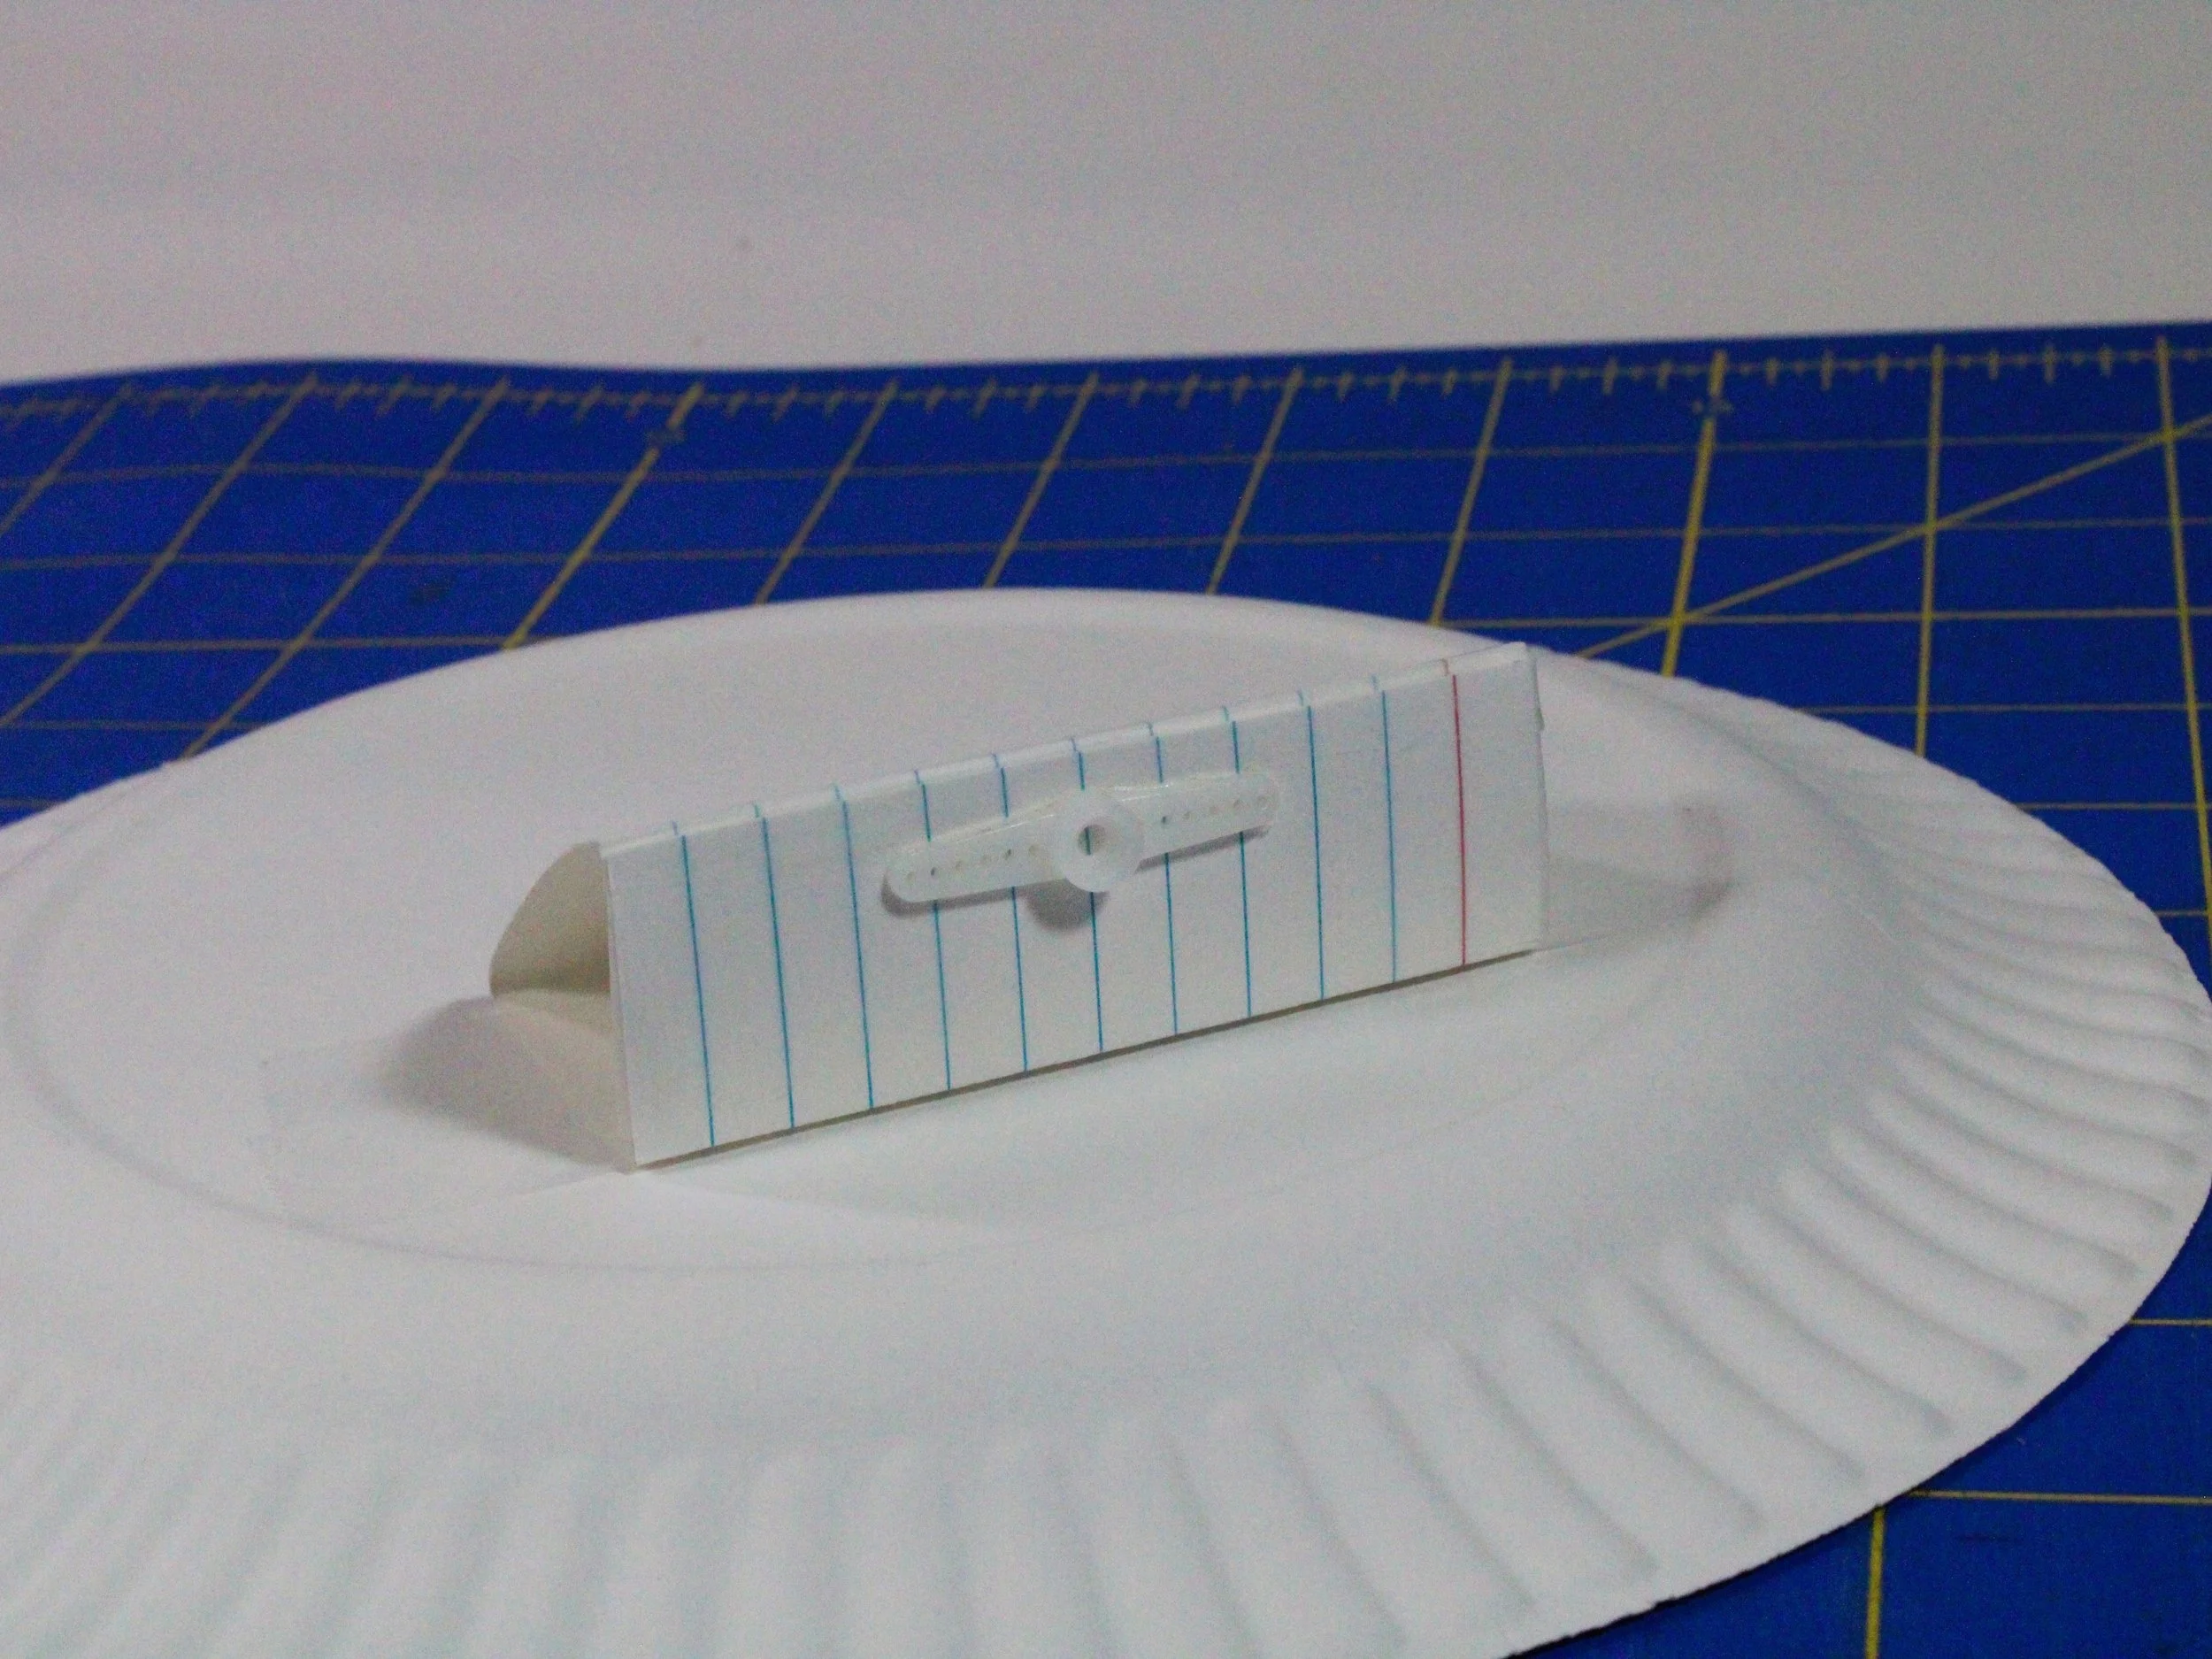
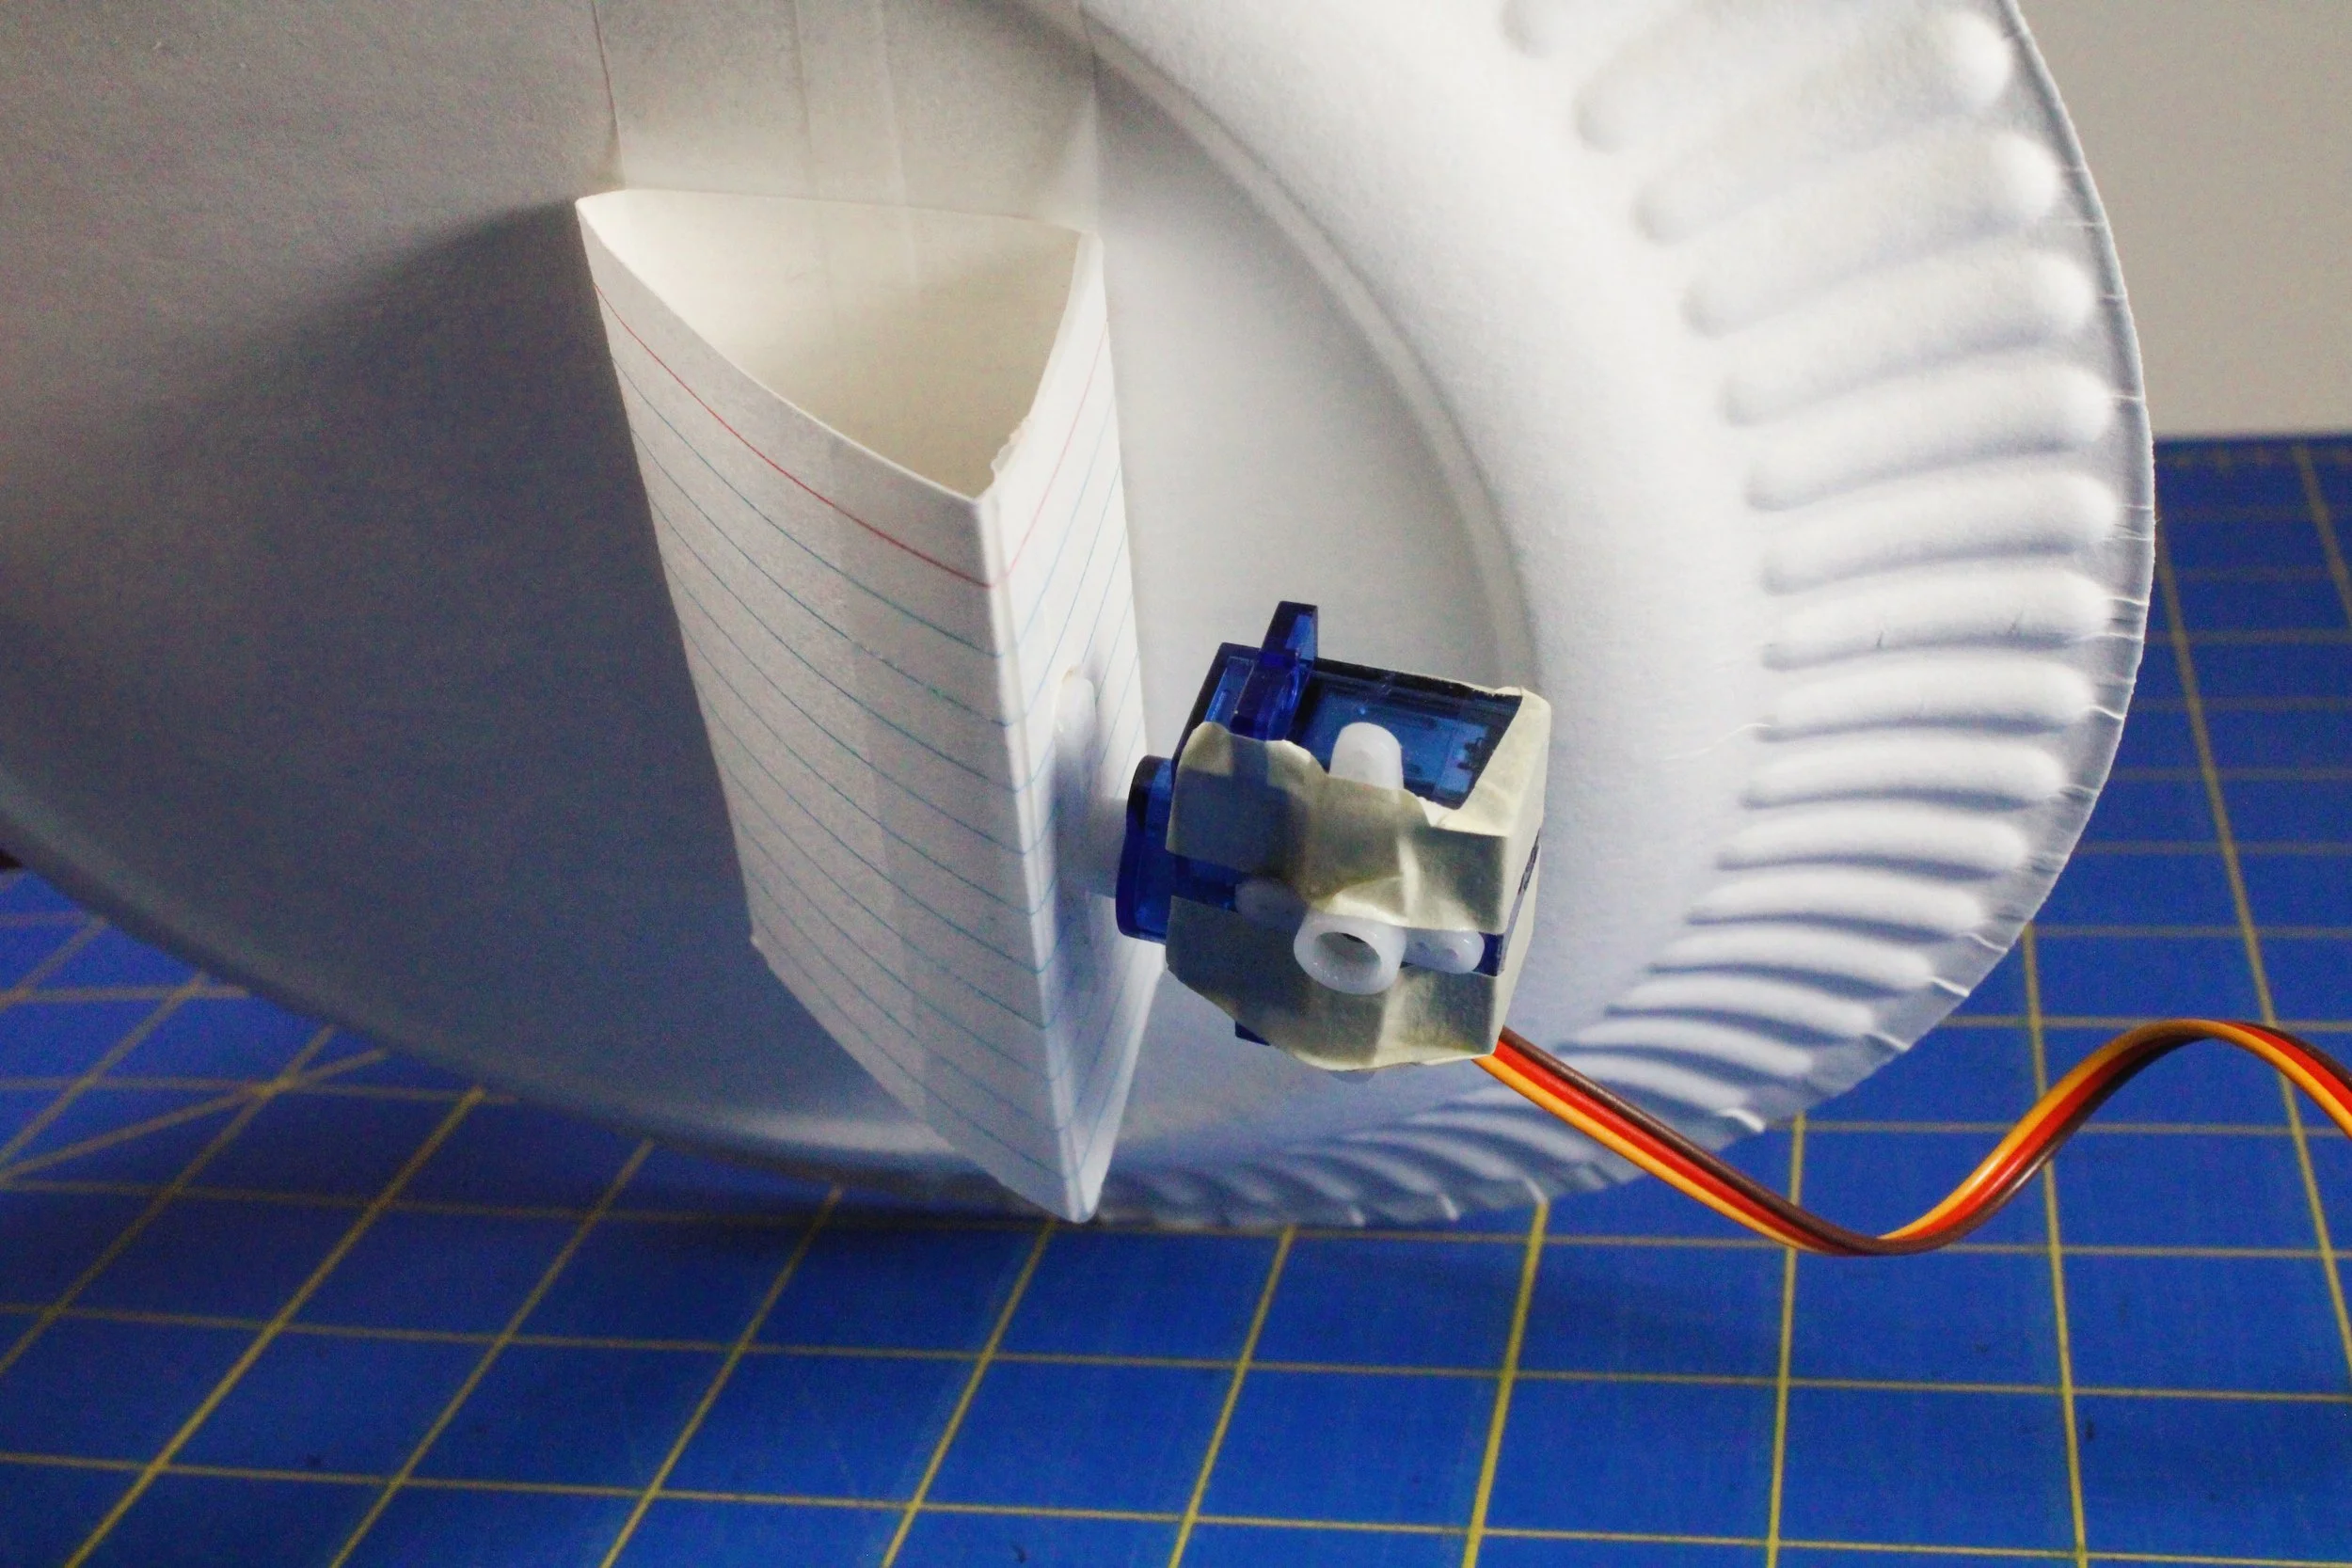
Fold up a 3 X 5 inch index card or scrap of cardstock to make a wedge-shaped holder for the paper plate.
Fold each end up about an inch.
Overlap and tape the end flaps together.
Press the rounded middle down to the table to make a wedge with a sharp corner.
Use double-sided tape to attach a long servo horn to the short end of the wedge. Tape the flat side of the wedge to the bottom of a plain paper plate.
Take a new paper plate and make a maze try out. Use the skinny paper cardstock strips to make the walls. Leave enough space between them for the ball to roll around. To play the maze, secure it to the plain paper plate with paperclips.
Electronics and Coding Instructions

To code bottom swivel (1st) motor:
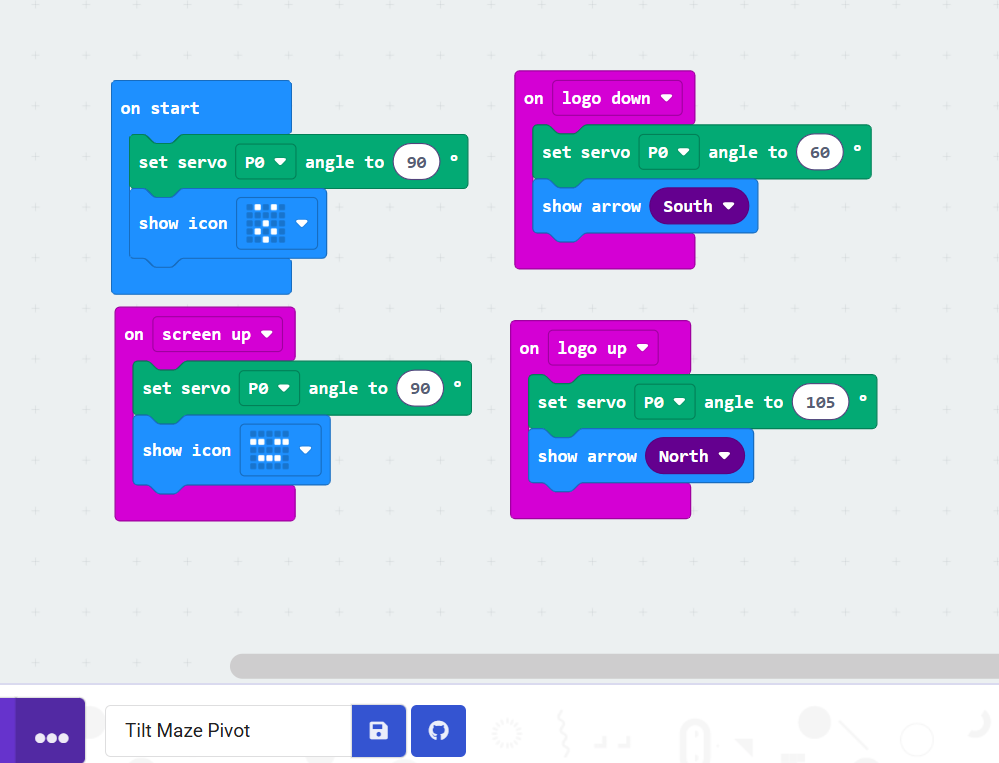
Add the Servo block menu to the screen.
Set the servo to 90 degrees (neutral). Add some lights to show it’s running.
Get an on shake block from Input. Set it to on tilt left. Insert a servo block. Slide the number to the left. You can adjust the number of degrees as you test your maze.
Repeat and set the new block to on tilt right. Make it move the servo to the right.
Repeat again and set to on screen up (board face up). Move the servo motor back to neutral (90 degrees).
To code top pivot (2nd) motor, repeat the steps above to set three new on shake blocks:
Set on logo down (facing towards you) to move servo to the right (don’t go all the way, since the paper can only tilt so far).
Set on logo up (facing away from you) to move the servo to the left.
Again, use on screen up to set the servo to neutral (90 degrees).
Make a controller from another heavy plate or piece of cardboard that can hold the two boards side by side.
Download the code to the micro:bits, then attach each micro:bit to its motor.
Attach the boards to the controller with loops (or wads) of sticky-side-out masking or duct tape.
Plug battery holders into one or both of the boards. Tape the holders to the back of the controller with more wads of tape. Make sure the side that slides open to remove the batteries is facing out.
Insert the batteries (or plug the USB data cable to the computer) for power to test the controller out.